06 Nov Tue 2012
Everything likes chicken
Seems like a large part of a chicken-keeper's life is spent protecting them from everything out there. "Tastes like chicken" isn't a cliche--it's the truth! Everything loves chicken.
Back in August, 58 day old chicks arrived at the farm. 25 Red Star, 25 Black Star, 5 Ameracaunas, 1 "Exotic breed" and 2 extras. I know I've lost 3 of them to who-knows-what and 2 of them to predatory hawks. I thought I had overhead predators foiled with fence wire and surveying flags every 4-6 feet over top of the pen but I've seen hawks circling the pen on numerous occasions. I've tried to count the baby chickens--it's really hard to cound 50+ chickens while they are milling about the pen. The most I can count is 47 or so. That means the hawks are winning.
So, I have to be smarter than the hawks. I have a computer. I found an article in an old Mother Earth News about someone who strung fishing line in a "cobweb" over the chicken coop. A spool of 10 pound test, about 45 minutes and tripping over several curious chickens and Voila! I hope the hawks can see fishing line.
Another recent note on the chicken predators--of the subterranean kind. "Gopher" rats have invaded the Happy Hens complex and have undermined a lot of rock paving put in place around the coop. Again, I inquired of the Internet how to deal with the problem and an "old time remedy" for dealing with these type of rats (without poison) is to use a mixture of cornmeal and plaster of paris. I used 1/2 and 1/2 and poured the mix down into the holes that the rats had made. It turns to "concrete" in their stomachs and kills them.
Religiously, every day for two weeks, I poured a handful of the cornmeal/plaster mixture into each hole the rats had made, and finally I smelled the stench of a dead rat--yay! Since then I've smelled that smell a few times. This is going to be an ongoing process as rats multiply continuously, AND a continuous process keeping an "eye on the sky". Then there are the raccoons, muskrats, weasels ........
18 Oct Thu 2012
Progress of beekeeping on the farm
As mentioned in an earlier post, back in the summer I got bitten by the "bee bug". After reading and reading and studying and attending meetings I've finally narrowed down the many choices for beekeeping styles to a Langstroth hive consisting of 8 frame medium supers. They are lighter than the ten frame deeps that most beekeepers use, because they don't hold as much honey and comb as the 10 frame deeps.
I've also been reading about how the wax foundation that most beekeepers use has become contaminated with pesticides that beekeepers have been using for years. I'm going to use frames so I can extract the honey and be somewhat flexible in moving frames, but I'm not going to use foundation. I've read that bees build natural comb as fast or quicker than they do on wax foundation AND the foundation that is available is bigger than the normal size cell that a bee builds on their own. This seems to facilitate the space for the Varroa mite to infest the brood nest of a colony. I intend to keep bees the same way I garden, and that's "organical", so I'm going foundationless as well.
One thing I think I'm going to do is put Warre hive roofs and quilts on them to provide ventilation. I didn't know it but bees have a real problem with condensation inside their hives, and they can actually drown, especially in the winter. The Warre hive quilt and roof provide "breathable" insulation and a vented roof, so I'm going to put that on my hives instead of the normal flat roofs you see on beehives.
The area for the apiary on the farm that has been selected is nearby so I can watch the bees, it faces east, has a stream nearby, and is situated near a tree line to provide shelter from winter winds. I've read that the ground needs to be clear of vegetation so if a bee falls on the ground while flying back to the hive that they can get back on their wings if not hampered by vegetation--so, I cleared the vegetation from the area and now I'm spreading wood chips from the utility company all around to make a nice clear area for the hives.
During the state beekeeping conference I attended a workshop where our state hive inspector opened a hive and showed us all kinds of things inside the hive; I like to pick up little tidbits during workshops and one thing he did say that was quite interesting was that one of the beekeepers in the state uses a 1 inch layer of lime underneath his hives to combat the small hive beetle. He spreads it to a 3 foot area around the hives and the inspector said he had never seen a beetle in one of those hives. Well, I have a huge pallet of lime that a friend gave me to lime my gardens with when I moved here, but turns out that my soil has a pH of 6.8 so I didn't need lime (very unusual in this part of the state). That pallet of lime has just been waiting for my hives! As soon as the wood chips are all in place and the hives go up, then I'll place the lime in its new home.
Today I purchased the lumber for the hives and I bought enough frames to do one box--I'm so excited :)

More info as the bee project progresses!
Time to light the fire
I don't know about where you live, but this fall in Tennessee has been absolutely AMAZING! The weather has been in the 60's and 70's, cool nights, rain every few days, and the colors on the trees are quite spectacular.
The cool nights bring on the woodstoves and fireplaces. Many years ago a guy I worked with showed me how to make fire starters and I've been using them ever since. Thought I'd share the handy trick with you.
Save your old candles or ones that don't quite smell like you thought they would, and melt them down. I use a kitchen grease container on VERY LOW heat. A double boiler would be better, but anyway, after the wax melts, pour it into paper egg cartons, let them harden, tear them apart, and voila! Instant fire starter. Just set one on top of your kindling and light the paper carton and it works great.

02 Oct Tue 2012
It's been a "beesy" couple of days
This summer I became interested in keeping bees on the farm, for a couple of reasons. Number one is the increase in productivity of the crops grown on the farm, but also to maybe get a little honey off the hives to complement the mix of eggs, fruits, and veggies grown on the farm.
Earlier this year I met a lady selling honey at the farmers market. Turns out that she and my oldest son worked together when he was in high school. Well, she sort of "took me under her wing", and invited me to the Cumberland County Beekeepers meeting. I went to the meetings all summer, met some really nice people, and started learning about bees. I didn't realize that bees were so complicated! And so well organized--and they don't even have ears :-) It's all done with pheramones.
I've purchased three books "Bees for Dummies", Practical Beekeeping by Michael Bush, and The Backyard Beekeeper by Kim Flottum, who is editor of Bee Culture magazine. My beekeeping friend loaned me about 60 or more Bee Culture and American Bee Journal magazines to read. I've been reading, and reading, and Googling about bees and have just been really learning all I can about beekeeping and bees.
Well, beginner's luck would have it that the Tennessee Beekeepers Association Fall Convention was held in nearby Cookeville on Friday and Saturday (28 & 29) this year and I was able to attend both days. After learning about all the viruses, parasites, and hive bugs, the poor honeybees are struggling to stay alive. Add to that something that I didn't know and I bet a lot of you didn't know: In the spring there are about 1.6 million bee colonies that are moved to the almond plantations in California to pollinate the almond crop! After the bees get through there they will be moved to other "pollination destinations" throughout the growing season. These operations are also very stressful to the bees.
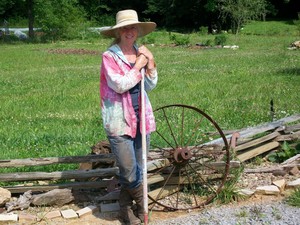
Another one of the classes at the conference was a hive inspection. I didn't know you were supposed to have a veil (I didn't even own one). A fellow Cumberland County beekeeper loaned me his hand-me-down bee suit:

That's me! We were all standing around our State Hive Inspector (he was teaching the class) and I could hardly get close enough to see in the hive so I stuck out my lower lip and mumbled "gee, I've never seen inside a hive"-- well, the waters parted! I got front row and a drone placed on my arm. We saw lots of hive beetles, varroa on some larvae, and a bee with "deformed wing syndrome". All-in-all the hive was healthy though--the inspector said he could always find things in hives.
Another class I attended was nectar and pollen plants for bees--I was so happy when I left that class because the bee-girls are going to be thrilled at what grows around here!
Other classes on feeding bees, getting them through the winter and first year beekeeping just confirmed a lot of the information I had been studying. I'm sure glad I did study before I went to the conference, because it would have gotten really confusing if I didn't have that little knowledge beforehand.
They had door prizes and I won a year subscription to The American Bee Journal! That was a nice prize. Before I left the conference I bought a jacket and veil. It makes the whole process feel more tangible--my first"bee thing" AND if someone does invite me to go with them to their hives, I'll be better prepared.
One of the winter-time projects around the farm is to build bee-hives for the spring arrivals. A couple of the presenters said to get at least two and not more than 5 hives so they can be compared to each other. I'll post the progress of the beehive construction . . . a friend has promised to saw some poplar on his sawmill for this project, so for now I wait on lumber.
23 Sep Sun 2012
Swiss Chard and Sweet Potato Fritters
We've spent most of our lives being told to "eat your vegetables" and now that we are, we're being told to "eat your green vegetables". For years and years I tried to act as though I liked greens (spinach, turnip, chard, kale, mustard) in the cooked stage, but it was all an act. Having been raised on canned food both at school and at home, greens were just a slimy mass that required vinegar poured on them to make them palatable enough (huh?) to go down.
In my opinion, anything that requires vinegar in order to make it palatable shouldn't be eaten anyway. Enter fresh greens.......
Although I'm still struggling with the texture of a bowl of cooked, steamed sauteed or otherwise heated up greens, it is definitely getting better. I actually lightly steamed/cooked some fresh kale in beef broth a couple of months ago and it was DELICIOUS! I since haven't been able to duplicate the event.
The menu for supper was all lined out the other night, but something green was absent from the list, so I ventured into the garden, picked a small bunch of Swiss Chard, medium sized leaves, and headed back to the kitchen.
Here's the recipe:
9-10 leaves of Swiss Chard, medium size (about 2 cups cut into thin shreds)
2 small sweet potatoes (about 1-1/2 cups grated)
1 egg
1 Tablespoon oil
1 Tablespoon or so of flour
a couple of teaspoons of honey
salt and pepper to taste
Put the oil in a large nonstick skillet and turn on medium heat. Mix the grated sweet potato and shredded chard in a bowl and add the egg and flour, honey and salt and pepper. Mix thoroughly. Drop by big spoonfuls onto the pan (oil should sizzle when mixture is added) and mash out into fritters about 4" in diameter. Let them cook on one side until browning and crispy then flip over and finish cooking on the other side. Drain on paper towels and enjoy hot! Actually, when I cleaned up the pan most of the oil was still in there.
Yet another yummy way to enjoy those all nutritious green veggies!
09 Sep Sun 2012
"Vegetarian" Chile Rellenos
Ok, I finally did it--made "vegetarian" chile rellenos and they were actually quite tasty. Through the years I've had eggplant fixed two different ways: eggplant parmesan or breaded and fried. It's great both ways, but boring. I subscribe to a blog called My New Roots and this lady comes up with some really interesting ways to prepare veggies. She uses eggplant as a neutral base for other flavors much as you would rice or pasta. Because it is sort of bland it soaks up other flavors nicely.
The ingredients in this dish are:
1 eggplant prepared and chopped (see below)
1/2 onion, chopped
2 Anaheim Chiles halved lengthwise and seeded
dash of cumin
4 small flour tortillas
oil for sauteeing
Monterrey Jack (or similar) cheese
Sour cream or cream cheese
splash of milk
The first step in making this dish is to peel and slice the eggplant then salt it really well and set aside for about 20 minutes. This causes a lot of the moisture to come out of the eggplant then you take paper towels and dry it off. Pulse the eggplant in a food processor until the consistency of ground meat (see where I'm going now?)

In a pan saute some chopped onion and a little garlic. I also put the anaheim chiles in this pan to soften up a bit before placing in tortillas. After the onion is soft, add the eggplant and a dash of cumin, salt and pepper to taste. I stirred this around for about 8-10 minutes to get more moisture out. When you're satisfied with this conglomeration, heat up just a tad of oil in a frying pan large enough to accommodate two tortillas and spread out a chile pepper on one of the tortillas. Add eggplant mixture and top with cheese (I used Cracker Barrel Aged Reserve cheese--YUMMY!) then top with the other tortilla. Place in pan on medium low heat until that side is browning then flip it over and repeat.

I made a sauce with some of the cheese, a dollop of whipped cream cheese and a splash of milk, then topped it with some freshly made salsa.
Very tasty.

Footnote: The Cracker Barrel Aged Reserve cheese AND the whipped cream cheese was purchased at a local grocery stored called United Grocery Outlet or UGO. The cream cheese was 50 cents a cup and the cheddar cheese was $1.29! If one were purchasing cheese for this dish I'd say Monterey Jack would work and sour cream would work in the sauce--HOWEVER if you've been reading my recipes very much you'll know that I never have everything in the pantry that a recipe calls for so improvising is one of my strong points!
31 Aug Fri 2012
Ground Cherries
Each year several new crops are trialed on the farm and this year one of those crops was ground cherries, aka cape gooseberries or poha. I'm assuming the poha name is native American in origin.
The CSA members have gotten a small helping in their shares for the last couple of weeks and with the exception of one member, everyone seems to like them. The true test of this crop's acceptance was at the Farmer's Market on Wednesday. To say the least, I spent a lot of time explaining what ground cherries tasted like, how they grow, and how to eat/prepare them. I even handed out samples.
The very first couple to show up at the table bought two containers after tasting the sample. That made me excited--then the "damp rags" showed up. You know, those folks who have to analyze everything. I'd say 95% of the people that tasted them thought they were very tasty and quite unusual--then they'd walk away....huh? A pint was only $2.00 and I'd sure pay $2.00 for something tasty and different ESPECIALLY if I had been given a sample. There were about 10 pints to start with and I came home with 3, so it wasn't a complete bust AND they will keep--that's a good thing!
I haven't figured out what's not to love about them:
- They come in their own little wrapper, just like a Hershey's kiss, so no washing required.
- They are really sweet and nutritious too.
- Great on cereal.
- Makes a great salsa.... http://catertots.net/by-type/vegetable/ground-cherry-salsa
- They will keep for months on the countertop inside their handy-dandy wrapper

The only thing I would have to say negative about them is that they are a little tedious to harvest as they fall on the ground when they are ready---hmmmmm maybe that's where the name comes from!
05 Aug Sun 2012
Basil pesto with spaetzle, beets and swiss chard
I've been scheming to prepare beets for supper, and there's an awful lot of beautiful basil coming in right now. A quick look through the pantry and I found a partial container of spaetzle I had bought on a shopping trip with a friend who was reminiscing about how her Czech grandmother used to make spaeztle and green beans.
The beets are going to take longer to cook than the pesto or the spaetzle so I washed about five 1 to 1-1/2 inch beets and trimmed off the tops and the roots. Put them in a microwave safe dish with a little water in the bottom for 5 minutes at a time until they are soft to touch--mine took about 9 minutes. Take them out and let them cool a bit. Meanwhile.....
Wash a small bunch of swiss chard and roughly chop. Heat a small amount of olive oil in a skillet, throw in a tad of garlic then the chard. Stir around until wilted down, add a little water and put a lid on until the chard is tender, about the time you're ready to eat this meal. While the chard is steaming,
Wash and put a couple of handfuls of basil into a food processor. Pour in about a tablespoon of olive oil, about 1/4 cup pine nuts, a couple cloves of garlic, salt and pepper to taste. Puree till smooth and set this aside. You've got water boiling for the spaetzle and now it's time to put the spaetzle in the water to cook. While that's happening, peel the beets, cut them in half, and wash your hands immediately so the red will come off.
When the spaetzle is done, drain it and toss with the pesto. Put the sliced, warm beets on the plate and cover with feta cheese (a wonderful taste combo). Plate up the chard and sprinkle with acid of your choice (vinegar, lemon juice, etc.) The best part of this meal is that the feta cheese tastes wonderful when it migrates over to the basil spaetzle AND when it stays on the beets.
Enjoy a quick and nutritious meal with fresh veggies!
02 Aug Thu 2012
Sneaky snake
OK--so all isn't exactly as we expect on the farm. This morning I set out on a mission to disassemble the chicken tractor and reassemble it into a chicken brooder. Soooo, I'm working taking the tractor apart and thought I'd take a break and go in and say "hey" to the girls. Wellllll, in one of the nest boxes was a great big loooooong snake all curled up---eeeew! I took a stick and poked at it and it went behind the nest boxes. Oh, yes, that's great...still in the house. Sooo, I gathered the eggs that the girls had laid and went back to my destruction job.
A couple hours later I decided to check out the chicken house again and, oh yes, the snake was back. I stepped outside, got a shovel, secured the snake behind its head and grabbed it with my hand. It had an egg in it--I could see the outline of it in the snake's body---ewwwww!
I pulled the snake out of the nest and realized that I didn't have a bucket with a lid or a sack at the chicken house so I had to carry the snake all the way to the shop--seemed like a 1/2 mile but it's only about 80 steps. While on the way to the shop, the snake regurgitated the egg into the yard (unbroken, I might add), and I realized that snakes are really strong! It was all I could do to keep a hold of it behind the head AND it wrapped its body around my arm on the way to the shop---not cool I would say--ewwwww!
I found a sack inside a box that I had carefully closed the lid on--really hard to open a box with one hand and a snake in the other! ewwwwww! Got it in the sack and immediately it found a hole and poked its head out and started to escape--but I was able to keep it in the sack, get in the truck, drive about a mile up the road, and released the snake. I sure hope they don't come back from that far away.
Sorry I didn't get a photo, but my hands were full! Such is life on the farm.
I did get the chicken tractor disassembled and the baby chick "brooder" rebuilt. It was a must do since I've ordered 56 chicks to be delivered August 14!
28 Jul Sat 2012
A "glomato"?
If there were a contest for the ugliest tomato, I surely believe this one would be in contention:

See, I told you this has been a really weird growing season........
22 Jul Sun 2012
I've Got Worms!
When I told a friend that, she promptly said "I've got some diatomaceous earth"--I laughed and then told her it was nightcrawlers. I've been wanting to add worms to the menagerie here on the farm and about 3 weeks ago I made the leap.
My dad told me of a tv clip he had seen on a local news station about a couple raising earthworms for their manure. That's exactly what I'm wanting them for. The past couple of years I haven't liked the potting soil mixes that are available locally and I thought that maybe earthworm poop might be the answer. I watched the video clip on the internet (isn't technology wonderful sometimes?) and contacted the couple featured in the video. Turns out that they were downsizing a little so they had worms for sale. Yippee! Field trip. My best friend and partner in unusual field trips already had her day planned so I mapped out my route and 2 hours later I was standing in a garage-converted-to-worm-house, complete with air conditioning, all matching buckets, sifters, incubators, instructions on the wall.....a bit intimidating to say the least.
These folks had purchased the complete worm growing operation that cost well over $1,000. They feed the worms grain that they purchase from the supplier and they use leaf compost (sifted, I might add) for the worms to live in. I chatted with the lady for a half hour or so, learned a whole lot from her, took 3 paper sacks of worms (3 lbs) with me and started back home wondering how the newbies were going to adapt to life on the farm.
When I got home I gathered up 8 of the cleanest dirty 5 gallon buckets I could find and washed them all fairly well. I went to the leaf pile (see post on Black Gold to see how many leaves I have) and went to the oldest part of the pile to get the most composted leaves I could find. I got a tractor bucket full then proceeded to fill a bucket about 2/3 full of leaves that I had rubbed between my hands--sifting compost? That's for sissy worms (lol)! After I got one bucket filled with leaves I realized that I hadn't drilled the ventilation holes in them, so I got the handy-dandy cordless drill and drilled, and drilled, and drilled holes in the top 1/4 of each bucket. NOW for the leaves. I picked out the biggest globs, sticks, nuts, etc. and put the compost in the buckets and hauled them into the shop--my tiny 10x14 shop.
I started putting the worms in and thought I'd check online one more time before I did so to make sure I wasn't missing something important. I WAS! I read where the containers have to be dark and opaque because worms despise light. Uh oh--my buckets were white. Think---paint might kill them--leftover black plastic mulch and electrical tape! Problem solved. So now I filled up the buckets and tried to evenly distribute the worms between the buckets, and I put a handful of chicken food on top of the soil in each bucket. That's only until I can figure out how to wean them off grain and start them on scraps. I loosely placed the pretty purple bucket lids on top of the buckets and said "Welcome to Crab Orchard".
The next morning there were about a dozen worms that had crawled out of their buckets and committed suicide. WHAT? Not happy? I took off a lid and could see why--it was really warm and stuffy in there, so I took all the lids off and haven't had any more deaths due to crawling out on the floor since then.
The worm folks harvest poop every two weeks. I imagine they can do it that often because the compost that goes in the buckets looks like something you'd buy in a bag at the store and the grain smells like something wonderful to eat. I checked a bucket after 3 weeks and wow, there was enough poop in there to start playing with seedlings and worm poop. I decided that I would be a nice worm mom and sift their compost. So I spent Friday afternoon sifting and filling and separating worms. It really didn't take that long and I think they appreciate it. I'm still working on the food though.....here's their internet debut photo shoot....

Everyone seemed all happy and wiggly when I changed out their bedding and I promised them I'd learn more so I could be a better worm mom.......
13 Jul Fri 2012
Creamy Garden Vegetable Soup with Tomato Salad
So right about now the fridge is getting overrun with fresh veggies. It's hard to keep up with them this time of year. We had much needed rain all day yesterday and other than having to pick squash and dig potatoes in the rain, it was rather enjoyable.
I decided to try out a creamy fresh vegetable soup. It actually turned out to be very tasty and was relatively easy to prepare. Here's the recipe (it's a loose one, okay?)
Peel and slice about 3 carrots
Peel and cut 3 or 4 potatoes into 1" chunks
I used about 6" of a Daikon radish, peeled and 1" chunks
1 kohlrabi peeled and cut into about 1/2" chunks
Roma green beans, stem end broken off, sliced lenthwise about 3 times then crosswise to make "French Style" beans
Cover all these with water and simmer slowly until tender. You might need to drain a little liquid off at this point but save it in case you need to add some back.
Salt and pepper, parsley, and a can of cream of celery soup. I let this cook a while then added garlic powder, a dash of cayenne pepper and a package of frozen corn from last year. Then I added a handful of peas I had frozen earlier in the season. I stirred the pot vigorously to kind of "puree" the potatoes a little to make the soup creamy.
At this point I would have added some cream to thicken the soup a little, (if I had any) but a big dollop of whipped cream cheese was the best I could do. Stir the cream cheese or cream into the soup and let it thicken a little.
Yum!
For a side dish I prepared a tomato/rice salad. There was a bowl of leftover wild rice in the fridge so I took about 1/2 cup of that, chopped one tomato, 1/2 of one of the long Diva cucumbers growing so prolifically right now, a generous sprinkling of fresh basil, some chopped onion, minced garlic, then drizzled with lemon juice and a little unfiltered olive oil, salt and pepper, and tossed well.
Yum!
The best part of both of these recipes are that they use fresh ingredients that are pouring in from the garden right now, and that's why we garden (or belong to a CSA), right?
10 Jul Tue 2012
Good morning, my little chickadees
A friend loaned me an incubator to hatch a few chicken eggs, almost three weeks ago. The eggs have been kept at a steady 101 temperature and he had told me that on July 8 I should take the eggs out of the egg turner to let the babies hatch out without getting their feet and legs tangled up in the egg container. Well, Sunday morning I cut the tops of several egg cartons to put them in the incubator and voila! There were two baby chicks in there :-)
When I saw that the chicken-hatching had already started I needed to go down to the chicken coop and get the utility light with the 100 watt bulb that I use for a "brood box" heater. I went to the chicken coop, retrieved said light and headed back to the house. I was walking along, thinking about the chickens and other happy thoughts and Hattie (the battie Catahoula) ran in front of me. The next thing I knew I was laying on the ground, not even really sure how I got there until I saw Angus (the boxer) looking at me like I'd done something to him. I'd rather not type the words that came out of my little mouth at this point, but Angus understood and got under the truck. I didn't say anything else to him but I sure gave him dirty looks.
After I moved everything to make sure nothing was broken I stood up and realized that I had squashed the light and it fell apart. After straightening the fixture out, screwing it all back together and finding a new non-CFL light bulb, I found clean shavings and a big tub to put the babies in.
Today is Tuesday and there are 12 hatchlings with one struggling to get out of its shell. It's great fun watching them hatch and grow. I may get my own incubator.
24 Jun Sun 2012
Really "wild" things
While cutting flowers in the front garden last weekend, I spied the strangest Rudbeckia I've ever seen. I had to look twice and blink my eyes to make sure I was seeing just exactly what I was seeing....here it is


Yes, you are seeing correctly. The flowers in the front of the picture got hung up on the "black-eye machine"!
I'm going to save the seeds but they probably won't come back like this. It's always fun to see different things like this in nature; well, fun as long as it isn't a frog with three eyes or something different like that!
08 Jun Fri 2012
I have a new friend
A friend of mine incubated some of the fresh eggs from the Happy Hens and I wound up with 13 baby chicks. One of them couldn't walk and it just kind of stumbled around the box--couldn't eat or drink. I couldn't stand it. Rather than letting Mother Nature take her course and allow the others to peck it to death I quarantined the baby to its own box, complete with heat lamp, and forced it to drink every couple of hours. I don't know how to make a chicken eat, though, so the chick had to do that on its own. After a few days of being babied, taken on road trips, and coddled, the baby started eating on its own and then started walking. She also acquired the name "Lucky". I put it back in with the others and everyone did fine.
Now the chicks are about 8 weeks old and I've got a new friend--her name is now Lucille and she flies into my arms (kind of scary when I'm not expecting it) when I go into the coop to feed them. She will also fly up on my back when I'm bending over to fill their feeder (hmmmm I'm waiting to be fertilized on the back). Here's a pic----

The rooster is a Red Star and I'm guessing her momma is a Buff Orpington. Anyway, she's on her way to being one of the Happy Hens at Wild Things Farm!