
12 Jul Thu 2012
Canning Tips, To-Do List Tags & How to Can Yummy Sweet and Sour pickles and Mexican Style Salsa!
Heirloom Tomatoes... basil, garlic... oh my! Summer goodness just keeps flowing into our kitchens from the gardens. We are busy starting to put our food up for the coming cold months and how wonderful it is to watch those can shelves fill up with all that good stuff. Today we are going to busy making salsa and sweet & sour pickles. Every time we add to the shelves, I just stand back and cannot help but be so thankful for all we have. Life is good! Today I am going to give some helpful canning tips that I compiled several years back for my cookbook, "Lovingly Seasoned Eats & Treats" along with my salsa & pickle recipe... and of course[Read More]
11 Jul Wed 2012
Choosing Annuals, Keep Flowers Blooming, Mud Room Coat Racks and Yummy Breakfast Bake
10 Jul Tue 2012
Market Day At The Garden Gate Farm, Plant Tags, Plant Growing File and more yummy Market Fresh Recipe's!
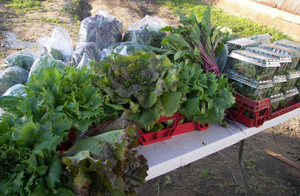
We have been busy... I thought today along with the normal fun stuff I like to share I would give a journal entry of "A Day In The Life..." at our farm on Friday while we get ready for market... so here it is... enjoy!
Here was our day last Friday... it was 97 degrees with a heat index of 103 degrees...
"We take so much care in what we do because we do it for you!" Jean Smith [Read More]
09 Jul Mon 2012
Landscape Design Tips, The Importance of Soil and Yummy Apple & Cinnamon Pancakes!
Bringing Children In The Garden and Yummy Veggies On The Grill!
I absolutely cherish the moments that I get to be in the garden with our children. It is quality time that I feel will make a lasting impression on their lives and hopefully create memories for them of special moments with mom teaching them about how God makes all this great stuff happen! I love to see them planting seeds, transplanting a tomato plant in the garden, tilling up the good earth and feeling that soft, rich soil squish between their toes! My children love to feel that they have their own little space in the garden, to grow the things that interest them, to experiment and to harvest what they tended. It can be a challenge sometimes to include them. It is often just easier to do it ourselves and just getting it done. It will usually add on some minutes, well maybe even hours, with the little helpers involved! But what memories you will make, what happiness will beam in their eyes when they pull out that carrot from the seed 'they' planted. That smile, that gleam in the eye is worth more than all the saved minutes of just doing it our self. I love everything about gardening... yes even the back wrenching weeding & hoeing, the sun burnt back of my neck and the stiff arms... I love gardening!
Here are some fun ideas to incorporate your children into your gardening 'thyme'!
Gardening With Your Children~
*Be sure to have child size tools for the little folks. You can purchase such items at just about any store that sells gardening supplies. Make them responsible for their tools- to put them back, keep them clean, and be careful when using. Add a name plaque where their tools belong in the potting shed or garage, make them feel special.
*Keeping them interested is another challenge, especially with the ones that aren't that interested. Allow them to choose what they would like to grow. Some suggestions would be giant sunflowers, pumpkins, decorative gourds or root crops. Radishes and lettuce are quick growers and can be 'encouraging' to the one that needs a little boost in interest. They are also available in multiple colors and sizes and can really encourage interest. If you choose a root crop I would suggest using some fun Heirloom things. Carrots for instance offer a multitude of shapes and colors, from Cosmic Purple to Lunar White and every shade of orange in between. Potatoes are also a fun crop. You can purchase red, white and even blue potatoes. Watch their eyes light up when they dig those potatoes.
*If you don't have a spot for a garden, let them Container Garden. You can use anything~ some fun things for the little people would be a wagon planted with some pansies, an old shoe with some Hen's & Chicks or any type of pot. They can plant herbs, flowers or veggies. Go back to my blog on Container Gardens in the archives to get more great ideas.
*Also in the archives you will find the blog with the Sunflower House so your child/ren can create a secret room or play house.
*Plant a cucumber plant; once the plant starts to form flowers it will not take long for it to start changing into a cucumber; once the cucumber is still small enough to fit into the hole of a 20oz. or so plastic bottle, carefully insert the cucumber into the hole. Make sure the bottle is clear; once the cucumber 'fills' the bottle, pluck it off the plant and carefully cut the bottle off! Presto, a bottle shaped cucumber. This would work with many types of veggies, try out a few and use different containers to make multiple shapes.
*If you grow a pumpkin plant, once the pumpkin is about 6 inches across, carefully scratch the child's name and a silly face into the skin being careful not to puncture. Over time as it grows, the drawing will grow right along with it!
*With a stick, trace the child's name into the soil in a planting area; sprinkle lettuce, radish or carrot seed in the name. Watch it grow!
*Be sure to take tons of pictures of your child in the garden and even photograph the planting, growing and harvesting process so those precious memories will not be forgotten.
Veggies On The Grill
As I have mentioned often, we love to grill and it is grilling season. I will probably be giving lots of grill time recipe's so if you don't have a grill, now's the time to get one!
4-6 large red skin potatoes from The Garden Gate Farm, washed & cut into chunks with skins on
1 yellow onion from Garden Gate, cut into slivers
1 clove of garlic from Garden Gate, minced
1 cup spinach leaves from Garden Gate, washed & trimmed into bite size pieces
1 cup of Heirloom Cherry Tomatoes from Garden Gate
1 medium yellow squash from Garden Gate, sliced 1/4 inch thick
1 tsp. Matt's Mix Seasoning Salt
1/4 cup fresh Thyme from The Garden Gate
2 Tbsp. Olive Oil
3 Tbsp. butter, diced
piece of foil wrap large enough to hold all ingredients and be folded over and sealed on top and sides.
1. In foil place all veggies; sprinkle evenly over top with seasoning and herb; drizzle Olive oil over top; put dobs of butter evenly dispersed over all.
2. Fold over the foil across the top and sides so it doesn't leak.
3. Place on top rack of grill and let cook about 45minutes to an hour.
This goes great with any type of meat, so grill some awesome T-bones from Garden Gate to go along with it, and let your taste buds be taken to an all new level!
Happy Day,
Jean
05 Jul Thu 2012
Houseplant Tips, Season Planting Guild, Name Bookmarks and Yummy Spinach Pie!
I am probably not the most likely person to be giving Houseplant Tips, but I decided to give it a shot anyway. Taylor likes them and I have had great success with my Jade Trees- they require very little care. Recently Taylor & I were at a house warming party and I noticed the hostesses giant African Violets! I didn't even know they got that big! Anyway, I asked if they were some new hybrid variety or something. No she said, they were not. I marveled and said I have only ever killed them no matter what I tried- by the way, I have never read anything on them prior to this, so I probably didn't care that much anyway, but these enormous plants amazed & intrigued me. This sparked a lively conversation on the plants & what tips several of the others had. So here are some Do's & Dont's to African Violet Care, I hope they help!
*Do:
~ water them from the bottom by using a deep set plant saucer, using hot water. ~ crush washed eggs shells and put in a bowl with hot water and set the pot in it until all water is absorbed- this gives them needed calcium.
~ Let them totally dry out and then water deeply.
~ Put them in a window where they will have indirect light.
*Don't:
~ever water the leaves.
~water with cold water- they are tropical plants.
~dead head- remove spent flowers.
These are just a few of the tips that I thought were most prosperous!
As I mentioned above I have had great success with Jade Trees. They do not require a lot of care and grow to size according to the pot you put them in. My tree is about 3 feet tall and the trunk is about 6 inches in diameter. It is quite beautiful and it gets a lot of ooooh's and ahhh's when friends come over. Although I will say, mine is small compared to some that I have seen. Jade Trees are very easy to propagate- make new plants from. You can use one of three very easy methods, here they are-
1. Simply take a branch that is about 5-6 inches long and put it in a glass of warm water. Give it clean water every 4-5 days and watch for little root hairs to start. After it gets several root hairs plant in a pot with potting mix and watch it grow!
2. Take a branch as described above, but go ahead and bury about half of it directly in a pot with potting mix; Be sure to strip leaves off of the buried part; keep watered and moist to stimulate root growth. Within about two to three weeks you will notice new leaves coming out of the stem. In the meantime some of the original leaves may wither and fall off- don't give up it will live!
3. If you only have a small plant and want to grow more but there aren't any 'branches' to speak of, you can still propagate. Take a leaf and lay on top of a pot of potting mix with the stem tip slightly in the dirt; keep moist, do not let it dry out- but don't soak; a slight misting regularly will be good in between watering's. You will be amazed at fast it will take root and start growing.
It is time to start thinking about planting garden with all the early spring things that are readily available to you. Here is a basic Planting Guild that will help you get the basics in your veggie garden through planting season.
Early Spring- that means now! Peas, onions, potatoes, lettuce, radish, spinach and chard.
Mid- Spring- around the end of April to mid May- Beets, broccoli, cabbage, carrots, cauliflower, celery, fennel. You can also do a reseeding of lettuces and radishes to keep a steady supply.
Late Spring- after the last predicted frost- end of May, typically- Beans, corn, cucumbers, melons, squash, and pumpkins. Some things you need to grow as plants at this time, not seeds- eggplant, peppers, tomatoes and sweet potatoes. Plant your herb plants now too.
If a light frost does touch your late Spring crops you can save them by taking a watering can and sprinkle all the plants BEFORE the sun touches them. Once the sun touches the plants they are burned and will more than likely die. Certain things will only get tip burned- lettuce, chard, radishes, spinach and potatoes. These things will grow out of it if they had their true leaves. Seedlings will need to be sprinkled.
Another easy way to prevent frost damage is to cover with light sheets, or if you want to be fancy, you can purchase 'fabric row cover' from green house supply companies. Most seed catalogs even offer it now, but sheets work just fine for the small home gardener. Do not cover with plastic though unless you have a way to prevent it from touching the plants. The plastic on the plants will cause them to be tip burned as well.
A friend of mine makes these charming Bookmarks for all her family members and friends. They are really special yet simple and easy to make. She takes the persons name and puts a Bible verse next to each letter as it pertains to it. I have attached a photo of it for you to get the idea. She laminates them so they will have a longer life and this adds a professional look to them.
Yummy Spinach Pie
The spinach is in abundance right now and what else do you do with it except add into salads or steam you might be asking. Well spinach is loaded with iron and is very tasty in many recipes including Italian Wedding Soup, quiches and lasagna. Here's one more to add to your spinach recipe folder!
6 cups baby spinach from The Garden Gate, trimmed
1/4 cup sweet onion from Garden Gate, chopped
2 eggs from Garden Gate, beaten
2 Tbsp. grated Parmesan cheese
1/4 cup grated Colby jack cheese
1 cup milk
2 Tbsp. salad dressing
1/2 tsp. salt
1/8 tsp. pepper
1/8 tsp. celery salt
1. Rinse spinach; chop and place in a large saucepan over medium- high heat; Cook covered for about 3-5 minutes, or until wilted; Drain, pressing out as much of the liquid as possible.
2. Combine remaining ingredients; fold into spinach.
3. Spoon mixture in a well greased 9" pie plate; bake at 375 degrees for about 40 to 45 minutes, or until a knife inserted in center comes out clean.
Happy Day,
Jean
03 Jul Tue 2012
Preserving Herbs, Grilling Tips, Yummy Grilled Pizza
02 Jul Mon 2012
Mountain Pie Suppers, Homemade Napkin Rings, Cute 'Cookie' Packaging, Taylor's Best Ever Chocolate Chip Cookies!
01 Jul Sun 2012
Idea Note Books, Remembrance Shadow Boxes, Edible Centerpiece and A Yummy Romaine & Bacon Salad!
29 Jun Fri 2012
Decorative Garden Journal, Gardener's First Aid Kit, Testing Old Seeds, Freezer Strawberry Jam and Yummy Heirloom Brushetta
"Flowers have spoken to me more than I can tell in written words." Lydia M. Child
I often talk about my love for journaling and awhile back I talked about a Cookbook Journal I had made for my daughter Taylor. Well, I also have created several Gardening Journals to show the progress of my gardens as the years go by. It is fun to put the photo's in along with magazine articles or pictures that inspired me to my newest creation. As the years move forward seeing the growth and changes that naturally take place in a garden are both exciting and joyful. This morning while I should have been busy harvesting, I just couldn't resist taking a few moments to weed the Pergola garden and walkway... it is so relaxing for me... the cool morning with the light fog across the fields is so inviting as I prepare for the heat of the day. Yesterday Taylor took the boys swimming and I had some quiet time... in my gardens... Well here we are at the end of June and I haven't even given you a Strawberry Freezer Jam recipe... shame on me! Well they are still in season so here is my families favorite and if you were fortunate enough to be one of our Winter CSA members you got this in your shares... so here's the not-so-secret recipe! Enjoy!
Gardening Journal's can be made from any type of book you want... you can even make a homemade one for that matter. Pre-made scrapbooks come in so many styles you are sure to be able to find one that suits your style- botanical, cottage, Victorian, English or shabby chic... the choices are endless. Ordinary composition books work well and these can be easily personalized. You can design the covers to inspire their contents and your gardening style. A color photocopy of a any picture from a gardening book or magazine can be used; Just about any type of sturdy, decorative paper, including maps and wallpaper, can be used for the pages of your gardening journal if you decide to go homemade.
Here are the materials and instructions on how to create a home made journal using a composition book- (SEE ATTACHED PHOTO)
Tools and Materials that would be helpful in this endeavor:
Ruler
Blank composition book
Scissors
Patterned paper
Glue stick
Bone folder or wallpaper squeegee
Craft knife
2-inch-wide self-adhesive linen tape- be sure the color matches your theme- can purchase at any craft store.
Customized Journal How-To
1. With a ruler, measure the front cover of a blank composition book. Adding 1/2 inch to all sides, measure and cut two pieces of decorative paper to size.
2. Apply a thin layer of glue to the front cover of the composition book including the spine. Lay a piece of decorative paper patterned or a photocopy of one that you have chosen side down on a work surface, and carefully center the book's glued cover on the paper. Turn the book over, and use a bone folder or squeegee to smooth out any wrinkles; let dry. Carefully trim excess paper using a craft knife. Repeat process with book's back cover.
3. Cut a piece of adhesive linen tape slightly longer than the book's spine. Remove the tape backing, and carefully center the tape along the spine. Adhere the tape to the spine; use a bone folder to smooth out any wrinkles. Carefully trim excess tape using craft knife.
As gardener's we all should have a First Aid Kit handy in the potting shed or at least in the house. Our garden's have many hazards all there own and we should take precautions to be safe. It harbors insects that bite, thorns that scratch, and other potential nuisances that may require simple first aid.
~ A basic kit should include the following: alcohol for cleaning wounds, triple anti-biotic ointment, cotton balls, bandages of all sizes, gauze and tape, Epsom salt for soaking, tweezers for thorns and splinters, organic insect repellent and sunscreen, anti-itch cream for stinging nettles and poison ivy, Benedryl, and of course some wonderful organic hand cream to sooth and soften your dry skin at the end of the day.
*Be sure that if anyone in your home has KNOWN allergies to bee stings you have an epee pen on hand at all times when out of doors. Be sure to check with your physician for info on this.
Testing Old Seeds
Many of us are still planting and adding things into the garden. We come across a spot that we are sure could fit one more thing in and decide to plant... what shall it be as we sort through all the leftover seeds? Or we may have some seeds that germinated spotty in the garden so we want to fill in and get a full row. Succession planting keeps us busy seeding and planting right through into late fall. With this in mind you will want to be sure your seeds are viable~ especially if saved over from last year. I save seeds for up to 3 years, some think that is foolish, but I always do a germination test and I have not had many disappointments. This sounds much harder than it is, but anyone with water, paper towel, plastic baggie and seeds can do it~ really! Seeds saved can be worth sowing -- but only if they pass this germination test:
* Fold 10 seeds in moist paper towel, place in resealable bag, mark with date put in and the date germination if viable should take place, as well as the type of seed.
*Be sure to read on the package instructions how many days the seed takes to germinate~ add a couple to be sure. *After the 'day's to germination' have safely passed by, open the paper towel to see how many of the seeds germinated. *Multiply that number by 10 to calculate the percent of germination. More than 70 percent is passing. If between 40 and 60 percent, sow thickly. Below 40 percent, it's best to buy fresh seed.
~Be sure to keep any seed you want to save for next year in the freezer in air tight freezer bags or plastic containers. Also be sure to label any packages that may be tattered or where the labels may be faded.
Cute Personalized Herb Pots... make cute gifts or are a wonderful addition clustered together on your window sill or table top. Personalizing them is so super easy, yet adds such a flare to the simplest pot! Individually, they're portable and easy to handle: Bring the basil indoors, for example, when making pesto, instead of stooping in the garden. When you plant the herbs, label the rims with a permanent felt-tip marker, and use these pots year after year! (see attached photo)
Strawberries, strawberries... oh yummy strawberries! Here is our families favorite Strawberry Freezer Jam recipe. This is one of the few jams I don't can... Strawberry Jam frozen is like eating them fresh picked~ there is no comparison with canned!
Strawberry Freezer Jam
3/4 cup pectin - equivalent to 6oz. (like sure-jel)
1 1/4 cup water
4 cups whole strawberries (1 quart container)
4 cups organic raw sugar
*Following the instructions, especially with the amount of sugar is crucial to have proper set up! DON'T SKIMP ON THE SUGAR!!!!
1. De-stem berries and then crush berries in a bowl; add sugar and stir for 3 minutes until sugar is dissolved. Let stand for 10 minutes.
2. Boil pectin and water for exactly one minute and 45 seconds! Start timing when the mixture is at a rolling boil.
3. As soon as the time is up add the pectin mixture to the strawberry mixture slowly pouring in and continually stirring for 3 minutes to dissolve sugar completely! It will be grainy if it is not stirred long enough.
4. Pour into either freezer containers or canning jars. Leave 1 inch head space in either container.
5. Let set on your counter for 24 hours before freezing.
Super yummy!
Heirloom Tomatoes, fresh garlic and just picked basil... this all adds up to Brushetta at our home! Here is our families favorite recipe!
Brushetta
1 loaf Persian Bread from Sunflour Bakehaus or a loaf of fresh bread.
7-8 Roma tomatoes or 4 to 5 large ones, diced~from Garden Gate~ multi colored looks best!
2 fresh garlic cloves, minced
1 tsp. sea salt or earth salt
1/2 cup olive oil from The Olive Oil Store, plus extra for brushing on bread
1/2 cup fresh snipped basil leaves from Garden Gate
Fresh Parmesan Cheese
1. In a 2 quart bowl put chopped tomatoes; sprinkle salt over top. Let set for about 10 minutes.
2. In the mean time snip basil finely; add basil, minced garlic and 1/2 cup olive oil to tomatoes; stir gently as not to mash the tomatoes. Place in refrigerator for at least 1 hour before serving so flavors blend.
3. Just before serving, cut bread into 2-3 inch wide pieces, then slice diagonally; lay on a cookie sheet and brush olive oil onto one side, flip over and brush oil on other side; place in oven under low broiler and toast until golden, about 1-2 minutes; flip and brown other side.
4. Top bread with brushetta topping; grate fresh Parmesan over top. Serve immediately.
Happy Day,
Jean
'Guinea Pig' Meals, Seed Packet Magnets, Sheets for Tablecloths and Springtime Salad, Salad Dressings and Homemade Croutons!
"Flowers always make people better, happier, and more helpful; They are sunshine, food, and medicine to the soul."
Luther Burbank
Meals are important at our house~ they are a time where we all sit together and talk about the days events, big news, mishaps or anything else that happens to pop up. Meal times can get a bit on the noisy side, but they are special together times that everyone gets to give their two cents worth. Last night at the supper table, Taylor said she wanted to do 'Guinea Pig' Suppers every night next week~ Neil said, 'no way'; Kyle said, 'yeah, cool'; Ethan said, 'uh-uh'; I said, 'OK, but I have to say yes first before anything is approved'; Neil said, 'That sounds better'; and then my sweet little 10 year old Ryan said, 'Where are we going to get the guinea pig meat?', quite seriously. So you may be saying, what is a guinea pig meal? Well they are fun & easy. All you do is try a new recipe that you think looks good that you have never tried, really not that scary. Anyway, I thought that this was cute!
*The other day I was at a friends house and they gave me a tour of their new 'little' greenhouse. It was cute- her daughter had saved several of her seed packets to keep for a handy reference. I saw them as something much different- cute Fridge Magnets for home & gifts of course! I am sure most of us gardeners are guilty of buying that 'extra' pack of seed just because of the package, the photo of the flower, herb or veggie- "Oh," we say, "I have to have that ....." . We all love a pretty picture- as they say, 'a picture says a thousands words'... So often I purchase a seed packet just because of the package. Seed companies would be smart if they all put more energy into the packaging! I have already used them as name cards at a tea party, pasted on the front of a homemade card and to make Fridge Magnets. It is so easy and they are the cutest gift to quick throw into a card you are going to send someone! Here's how~ You will need a laminator or self laminating sheets, a roll of self sticking magnet and of course your empty seed packets. Simply laminate the pack and then stick on the magnet! So cute, so simple and so fast!
*Some people collect shoes, purses, books, I collect table clothes. No matter what thrift shop I go to, the first place I hit is the linens department; I stand back and look down the rack so I can pick out the fabrics that catch my eyes~ plaids and floral's are always first on my list. After I find a few things it's off to the sheets~ yes the sheets! Sheets make wonderful outdoor entertaining table clothes; they cover picnic tables beautifully! I also have used quilts for a unique touch on a special occasion! Be creative, it's your table!
Everyone loves the first yummy things out of the garden in spring, lettuces, greens, spinach, radishes, scallions and the list can go on & on. Here is a variation to the everyday salad using some of Garden Gates awesome Bacon, lettuces, greens and radishes!
Garden Gate Farms Special Springtime Salad
1 bag mixed Greens from Garden Gate Farm, about a pound
1 bag baby lettuces from Garden Gate Farm, about a pound
1/2 cup chopped walnuts
1/2 cup chopped pecans
1/2 cup dried Cranberries or cherries or mix of both
1 bunch Radishes from Garden Gate, washed, trimmed and thinly sliced
1/2 pound Garden Gate Bacon, crisply cooked & crumbled
1/ pound blue cheese or feta cheese (without juice), crumbled
Poppy Seed Salad Dressing- see recipe below
Homemade Croutons- see recipe below
1. Wash & snip greens & lettuces into bite size pieces; arrange in a large salad bowl or on a large serving platter.
2. Layer each of the remaining ingredients, except dressing, on top of lettuce/greens.
3. Serve with dressing on side.
This is a large batch and will feed 12 to 15 hungry folks!
Yummy Poppy Seed Dressing
1/2 cup raw organic sugar
1 tsp. salt
1 tsp. mustard
1/3 cup real lemon juice
1 tsp. grated red onion
3.4 cup Olive Oil
1 Tbsp. poppy seed
1/8 tsp. pepper
Combine all ingredients and mix well. Refrigerate and serve chilled.
Homemade Croutons
1/4 cup butter
1 Tbsp. minced fresh garlic
1/4 tsp. each salt & pepper
1/3 cup grated Fresh Parmesan cheese
6 slices french or sour dough bread, day old is fine, crusts trimmed* (don't throw away)
1. Melt butter in a large skillet over medium heat. Cook until butter foams; Add garlic and cook about 1 minute; add bread cubes and toss to coat with butter.
2. Season with salt & pepper. Transfer to a baking sheet and bake at 375 degrees fro about 15 minutes, tossing once in between, until lightly golden.
3. Remove from oven and sprinkle with cheese and toss until cheese melts.
Makes about 4-6 cups.
*Don't throw away those crusts- put them in a freezer zip lock bag or freezer plastic container and freeze for up to 3 months. Use them for your next batch of homemade dressing!
Happy Day,
Jean
28 Jun Thu 2012
Plan A New Garden Now, Apple Orchard Strudel
Planning a new garden is always so much fun for me. Each year I get to draw up field, garden and flower bed plot plans! This is one way that I spend my winter days! If you start with a garden journal and jot down what your garden dreams are, add some pictures from magazines~ my personal favorite is Country Gardens~ then you will have a plan of action and goals to work toward. Pre-planning your gardens on paper will give you an idea of space needed & quantity of plants required to have proper fill effect. There will be plants you can start from seed and others that you will need to get from your local nursery. Look in seed catalogs~ we are all getting loads of those and plan for Fall planting of bulbs for next Spring now! You can always tweek things after you start, but having that plan of action will give you a visual aid that is sure to help in the long run. For the next few entries I will be focusing on Garden Themes and helping you plan ahead to get a beautiful and long lasting end result.
Here are a few simpler Garden Themes with some choice plants for each, choose one or all.
*Butterfly Garden~ Purple Cornflowers, Butterfly Bush, Bee Balm, Shasta Daisy, Primrose, any kind of Phlox, Petunias, Cosmos, and single Marigolds.
*Hummingbird Garden~ Trumpet Vine, Wisteria bushes, Morning Glory, Lilac, Bee Balm, Hyssop, Petunias, Lavender, Salvia. Any flower with a tubular flower will be much appreciated by our beautiful feathered friends!
*Bee Garden~ Hyssop, Bee Balm, Lavender, all of the Thymes, any mints, Lemon Balm, Roses, Geraniums.
Moon Garden~
At one of our first home's I planted a Moon Garden for the first time. I had saw the idea in a magazine and thought it would be a neat idea, I had no idea how amazing it would be! In the blackest of nights the garden simply glowed with life and the night insects it attracted was in itself so awesome! Using all white flowers didn't seem that appealing to me at first, I am more of a Pink & Purple kind of girl with a splash of orange & yellow around to add interest- but white against the black night is simply gorgeous. As the moonlight reflects off the flower petals it makes a spectacular silvery light that is breath taking. My Moon Garden was planted directly in front of our living room window where it could be enjoyed either while inside or sitting outside. Here are some flowers to be included as well as some night blooming ones!
*Silver Sage, Carnation, Angels Trumpet, Lambs Ear, Silver Tansy, Yarrow, Silver King & Queen Artemisia, Clary Sage, Horehound, Grey Sanolina, White Petunia's, White Cosmos, Mums, Tulips, Daffodils, Snow Drops and Hyacinths. If you have an arbor plant Sweet Autumn Clematis~ what a show stopper.
*Night Bloomers include Nicotiana, Stock, Roses, Veronica, Impatiens, Alyssium, Azalea and Jasmine.
Make a special day with some friends and go to your local greenhouses to get more ideas. Remember when you are planning your garden's to look at plant blooming times, sun requirements and growth height & habits. Try to choose a selection of plants that will give color starting in early spring through the late fall so you don't miss a beat! The end result will be one you will never regret!
Here is a yummy way to use Cabbage in a not so everyday way!
Apple Orchard Strudel
4 cups cabbage from Garden Gate, finely chopped
1/4 cup onion from Garden Gate, chopped
1 1/2 cups apples from Kapnick Orchards, cored, peeled and chopped
1/4 cup sour cream
1 tsp mustard
1 cup shredded Cheddar Cheese from Grassfields Cheese
8 sheets frozen phyllo dough, thawed
1 stick butter, melted & divided
1. Add cabbage and onion to a skillet coated with non stick vegetable spray. Cook, covered, over medium heat for about 5 -7 minutes.
2 Mix cabbage mixture with apples in a large bowl, stirring in sour cream and mustard; add to cabbage mixture.
3, Brush one sheet of dough with butter; layer on a second sheet. Continue to brush each sheet of dough with butter and arrange on on top of the other. spoon cabbage mixture down 1/3 of long side of dough.
4. Top mixture with cheese. Beginning with the long side, roll up jelly roll style.
5. Place on a 10"x15" jelly roll pan lightly coated with non stick vegetable spray.
6. Brush dough with remaining butter. Make 1/4 inch deep cuts about 2 inches apart along the length of the dough.
7. Bake at 400 degrees for about 45 minutes. Let stand for about 5 minutes before serving.
Happy Day,
Jean
27 Jun Wed 2012
Simple To Make Birdbath, Say I Love You with Herbs, Recycled Cloth Shopper Bags And Taylor's Ready To Go French Toast!
23 May Wed 2012
Nifty Bird Feeders, Homemade Hummingbird Nectar, A Lovely Garden Path and Taylor's Yummy Oatmeal Pancakes!
If you enjoy feeding the birds, here is a really easy bird feeder recipe that you and the children can make to stretch the seed out a 'little' bit longer .
*Nifty Bird Feeders~ General Recipe: Mix about a tablespoon of white corn syrup with approximately 1 cup of bird seed~ Make as much as you want and then using a rolling pin, roll out onto counter or table until about 1/2 inch think or so. Using cookie cutters have the children cut out shapes; re-roll any remaining seed mix until you have used it all. Using a thin dowel, no larger than a pencil make a hole about 3/4 of an inch below the top edge of the bird treat; using yarn, thin wire or twine make a loop about 12 inches or so long to hang it out with. You can also form into suet size to put into your suet holders.
*To make suet cakes use smooth Peanut Butter mixed with a couple tablespoons flour and mix in bird seed of choice, form into cakes and fill your holders. Keep these in shady areas because they will melt in the heat of August. You can store these in the freezer for up to 3 months, so have fun and make ahead when the peanut butter is on sale and you have time!
*If you do purchase pre-made suet cakes, save a few of the plastic holders they come in so you have a form handy and they will be the right size.
*Hummingbird nectar is super easy to make without buying the expensive mixes. Simply add to four cups hot water 1 cup of sugar; stir until sugar is completely dissolved then add 2 drops of red food coloring if you want to, but it is not necessary. Put in fridge to cool down and then fill your feeders- hang out and enjoy the flock that will come.
*Be sure to plant a row of Mammoth or Giant Grey Striped Sunflowers in your veggie garden or some in your gardens, you will be entertained in the fall by many birds looking for food!
*If you don't have room for a large bird bath somewhere, you can use large Terra cotta or plastic plant saucers for them. Put down on the ground next to a large shrub so they have somewhere to fly and be sure to keep clean water in it.
*A Pretty Cobblestone Walk ~ see attached photo
One of the first things I did when we purchased our home was plan all the 'future' gardens and then some. There was nothing here when we came except on overgrown apple tree, an ugly shrub next to the front porch steps, two lilac bushes, a hydrangea bush and one big beautiful Maple in the back yard. Some might be saying, "Well that's not too bad." Well maybe it's not to some and the ease of that would be just fine & dandy~ not so for me. I want gardens that surround and abound, both veggie and flower. In my opinion they go hand in hand~ you can't not have flowers in your veggie garden anymore than you can't have herbs and a few pretty chard or potato plants mixed in the flower beds. So the planning started. One thing I had to have was a cobble stone walk. A good friend of mine, also a gardener, had a form, soooo I put Neil to work, of course I helped, after all someone had to tell him what to do :-) ! He is my muscles when I need certain hard scapeing done, so we got the neighbors cement mixer, bought several bags of concrete and went to work. First I dug up the sod from the planned walkway; next I put down black plastic ground cover to hold back the nasty grass that would surly want to rear it's ugly head up into my path; next we put down about four inches of sand. Now we have a gravel/sand pit right across the road from us, so this is free for the taking for township residents. If you don't have access to free, then you need to buy enough to lay at least 4 to 6 inches of sand down for the stones to mold into. Now I needed my 'muscles' and as usual he came through beautifully. He mixed the concrete and filled the form on and on until the walk was complete. I wanted it to be more special though so I had each of our children press their little patties (hands) gently into a stone, then I carefully printed their name and the date in another stone beside it. I added marbles and made smiley faces with them in neighboring stones as well. I also had Neil & I do the same and put our wedding date and a heart made with marbles in ours (see photo attached). I wanted a bit more so I took some maple, fern and hosta leaves and pressed them into several of the other stones. Now after several years they are all still perfectly visible and are a happy reminder of a hard days work.
Pancakes can have so many variations, it's simply to the cooks imagination as what to add or not. Here is a yummy variation that goes over well at our house!
Taylor's Yummy Oatmeal Pancakes
1 Package of Taylor's Bake Shoppe 'Buttermilk Pancake Mix'~ follow package directions and then add to one batch recipe:
1/2 cup whole oats
1/4 cup more buttermilk
1 tbsp. Maple Syrup
Fry as you would and serve hot with Garden Gates Breakfast Sausage patties or links and a jug of Kapnick Orchards yummy Apple Cider!
Happy Day,
Jean,
07 May Mon 2012
Cookbook Journals, The Gift of Bread, More Garden Tips, Potting Shed Organization and Taylor's Yummy Beef and Veggie Soup
As I have mentioned so many times, I love to journal! Taylor was looking through the cookbook journal I had made her several years back and I thought that would be something interesting to talk about. After all I always add some recipes so why not. Journaling through my blogs has been such a delight for me and a way to share my thoughts and ideas with all of you. So often I get asked questions about a lot of the things that I have been blogging about and now I can direct the folks to this blog. Thanks for staying turned and if anyone has any question please don't hesitate to ask through our Facebook page and I will try to address each question as best I can!
*Several years ago I was going through one of my Scrapbook magazines and they had a whole section on Cookbook Scrapbook Journal's. Well that's all it took for me and I was right into it. I called my mom, Neil's mom & sisters and got all the families 'favorites'. One stipulation was that each had to send the recipes in their own handwriting- not typed. I had several of my Grandmas, her sisters, my aunts & my moms as well as some of my own from when I was a teenager. I also included some of Neils own concoctions along with his brothers. But I needed more than just the recipes- I needed photographs. I wanted photographs preferably of each person in the kitchen or doing something in the line of cooking- even camping & grilling. I got more than I dreamed of, this was going to be fun. One more key ingredient to the book was to be the story telling aspect of it- journaling! This comes easy for me, so with each recipe and photo is a short story about the cook and why the recipe is special. Being the avid scrap booker I am I of course had the perfect 10x10 inch Creative Memories scrapbook and all the supplies any one could dream of, so it was just getting it organized and decide on the format I wanted. Once I had all the recipes I made copies of all on Scrapbook paper so they would not deteriorate over time. I put the appropriate photos with the right recipes; I decided on my title pages and the order they would go in; knowing that this couldn't be an encyclopedia I had to decide on what recipes to use and which to scrap- (get rid of) -no pun intended- this was the hard job. In the end Taylor now has a beautiful Scrap-Cookbook that she truly enjoys and uses quite often.
*Everybody loves bread, and if they don't they should! Bread makes a lovely gift~ weather it be a yeast, sweet or flat bread, they are all yummy. To make your gifts of bread even more special, pick up inexpensive yet cute Tea Towels at discount stores and tie your loaf up into one, tie with raffia, jute or cute ribbon and add a special tag. The recipient will be so tickled.
*More Garden Tips....
*If you have a fireplace that needs cleaned out, right about now, don't just throw those ashes away- they have great garden value! If you have blueberry bushes or an asparagus patch put those ashes around the base of them. They will give the plants much needed potash for the growing season. Also, if you plan on planting peas in your garden this spring and know where the patch will go, sprinkle the ashes over that area and the day before you want to plant, till them into the ground! Beware- my pea vines got over 8 feet tall!
*Keep a five gallon bucket filled 3/4 way with oily sand to put your shovels, pitch & potato forks & spades in. It will keep them from getting rusty.
*If you are like me you will find yourself standing around the garden asking yourself, "Now where did I lay those clippers?" I don't quite understand why some of these garden companies don't think to make the handles on the tools bright colors so they are more easily found. Or maybe that is why they don't, because they get lost so easily and then we have to buy more~ now there's an "A-ha" moment. Anyway, until they do design them with them, pick up some bright color spray paint and spray the handles- no more 'lost' tools!
*This spring be sure to plan certain flowers into your garden plan- Marigolds, basil, nasturtiums should all be planted along with your tomatoes to keep bad bugs away and attract the beneficial's. They are not only pretty, but practical.
Potting Shed or Garage Organization is a key for a content & happy gardener. I am very blessed to have a very lovely Potting Shed and as I mentioned in a previous blog, it is a mess each spring that I need to clean out. This mess is never my doing, I will not take the blame for it. I have several wonderful helpers that just have not acquired my love of organization~ YET! Kyle is the closest yet with Evan not far behind. Everyone else is 'a work in process, or should I say progress?' Anyway, I have a spot for everything in my shed and I am much happier when I can find what I want when I want it. As I always say in & out of doors, "Everything has it's place so put everything back in its place.... please!" On that note, here are a few tips on organizing your potting shed, garage or where ever you store your tools.
*I put 2 sections of peg board in my shed, on which I use hooks to hang all my shovels, rakes, loppers and several other tools. I also hang small buckets and even a wire utensil basket in which I keep my hand tools in along with other small things. I used one of those plastic shoe organizers that hang on the back of doors to store nuts, screws, garden gloves, markers, hooks, ground staples and any other small things that I want to be able to see at a quick glance. I have several shelves where I keep planters, bird feeders,watering cans, etc. I also have an old kitchen counter with cupboards below where I store plastic containers, dirt, bird seed and any other extra stuff. I also keep five gallon buckets to use for putting my weeding garbage in. In the rafters I keep fold up chairs, my push seeders, shutters and other large items I don't have room for on the walls or floors. The outside of my shed is decorated to my liking- an old window with three old buckets for planters, an antique scale and of course an old fashioned bike leans on it. On the back I have an old french door surrounded by antique tools and a shelf above which showcases empty pots and bird houses. On the other side is the window with a planter under it which I plant with pansies each year. The front has two wash tubs, one on either side of the door that I plant with petunias, a "The Potting Shed" sigh I hand painted and of course a Welcome sign. You can use any of these ideas in your garage as well, simply pick a corner and deck it out with whatever you have. Watch at garage sales & flea markets for old counters or even an old table. Shelves are easy to come by; peg board can be got at any hardware store. The ideas are only limited by your space and creativity- so have fun and make it say it belongs to you!
Taylor's Yummy Beef & Veggie Soup
I know most of us think of soup in the cooler months, and with the way the weather has been the last couple weeks I wouldn't feel like soup either. The next week though is supposed to be on the cooler side so pick up a Garden Gate Chuck Roast tomorrow to make this super yummy soup next week! Enjoy...
3# or so, Beef Chuck Roast from Garden Gate farm (of course :-) )
enough water to cover roast and over about 4 inches
1 small red onion from Garden Gate, chopped fine
1 bunch Swiss Chard from Garden Gate, ribs & stemmed removed and then leaves washed and cut into bite size pieces
1 cup of Carrots from Willowridge Farm, cut into 1/2 inch coins
4 ribs of Celery from Willowridge Farm, cut into 1/2 inch chunks
2 cups Cocktail Vegetable juice, like V-8
1 tsp fresh Rosemary from Garden Gate
1 tsp. each salt & pepper from James Creek Sutlery
1. In a large crock pot add water, meat, onion, salt & pepper and rosemary. Cover and cook on low for about 8 hours.
2. Stir in carrots, chard, celery and cook until almost tender, about 1/2 hour. Transfer meat & veggies to a large stock pot; add juice. If not enough juice, add enough water to cover.
3. Cook on low for about another hour or until veggies are tender.
So good.
Happy Day,
Jean