28 Jan Wed 2015
January 27, 2015 Market News
Happy New Year Everyone! I hope this newsletter finds you all happy, healthy and well-rested after the bustling holiday season. I took a little break from newsletter production during November and December but am excited to get back at it. My seed catalogs have arrived and I can’t wait to start planning my garden and ordering seeds. Spring will be here before you know it and there are quite a few crops that can be planted as soon as the soil can be worked (see article on pg. 2). We may be digging out after Winter Storm Juno, but that doesn’t mean we can’t think about the greener and warmer days ahead. After all, only 8 more weeks until Spring!
Winter Farmers Markets
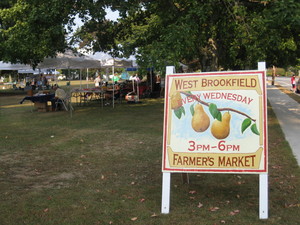
Remember, you can still have access to delicious, locally grown products even in winter. Many communities across the state have winter farmers markets and you’d be surprised with what is often available. Farmers are getting very creative with growing and storing crops over the winter months. Many markets have a great selection of root vegetables, greens, apples, pears, herbs, sprouts etc..along with the usual fresh baked breads and sweets, local meats, cheeses, yogurt, honey and maple. So try and visit a winter market soon….it will brighten your mood and your plate! Here is a link to a complete list….
http://www.mass.gov/agr/massgrown/farmers_markets.htm
•Wilbraham Winter Market: 2301 Boston Rd., 2nd and 4th Sat., 10-2, to April
•Worcester/Canal District Winter Market: 200 Harding St., Sat. 9-12, all year
Planning Your Garden from the Ground Up
There is nothing more satisfying on a cold winter day than sitting on your couch, surrounded by seed catalogs, designing your vegetable garden and flower beds. I usually start the planning process by asking myself a few simple questions….How do I want to arrange the plants in my garden? What do I want to grow? When will I begin planting? Do I want to grow my own seedlings for transplant or buy some from a local greenhouse? Can I use cloches, cold frames or a simple greenhouse to extend my growing season? (If you don’t have a garden plot already established, you will also have to think about where you should place your garden.) Once I answer these questions, then the fun can truly begin.
For those folks who don’t have a garden plot already established, there are a few things to consider when deciding its location.Important factors to consider include water supply, available sunlight (at least 6 hours of sun a day), slope (the flatter the better), plot size and plot shape.Once you find the ideal location then you can begin to consider the other questions mentioned above.
Arranging plants is not necessarily rocket science but I have found out over the years that some thought does have to go into it.Things to consider are whether you wish to plant in long/short rows, raised beds, single/double or wide rows, the height of plants you wish to grow and width of your paths. I also take into consideration the density of the plants in a row.Some vegetables like lettuce, spinach, kale etc…can be planted rather close together.This kind of density actually limits weeds growth.Tomatoes, peppers, garlic, onions and potatoes need alittle more space to be productive.
Deciding what to grow is not as simple as it sounds. Seed catalogs nowadays are just loaded with beautiful exotic flower and vegetable varieties and it is very easy to get caught up in the moment and purchase either too many seeds or vegetable varieties that end up being more work than they’re worth. I have finally reached a point in gardening where I plant only what I really like to eat and what I can store for the winter. Gone are the days of picking strange varieties of vegetables that look interesting but are difficult to grow or don’t produce a steady, solid crop. I am also a big fan of companion planting and so I make a point of mixing annuals and herbs in my vegetable rows and make sure not to plant certain vegetables next to each other if they don’t “get along”.
Deciding when to start planting your garden is another important topic of consideration when looking to buy seeds/starts. I have really embraced the idea of succession planting and so it is crucial for me to get into the garden as soon as the soil can be worked. An early spring garden is one of the most satisfying. By mid-April, I like to have lettuce, broccoli, carrots, onion sets, peas, early potatoes, radishes and spinach in the ground. I can harvest these early crops by May/June and replant for a late summer harvest. Some can be continually replanted and harvested right up until our first killing frost. Other crops like tomatoes, peppers, eggplant and cucumbers are considered warm-season crops and shouldn’t be planted until mid-June.
When trying to extend your growing season, simple cloches, cold frames or basic greenhouses are indispensable. Something as simple as a few gallon milk jugs set over a plant can retain extra heat, keep pests at bay and add a few weeks to the plant’s productivity. Cold frames are a bit more complicated but can still be made using fairly simple construction methods. I have used plastic sheeting over metal hops or PVC pipe to create lengthy row covers that work great. Whatever your visions are for your garden, whether big, small, simple or complicated, a little forethought and planning will help you create a beautiful, tasty, productive garden.Experiment and enjoy!
•Create a small garden group with friends to exchange seeds, starts and ideas.
Baked Stuffed Onions (from www.foodnetwork.com)
I made these on our gas grill a couple years ago when we lost power for 10 days. They were delicious. Onions, spinach, garlic and eggs are readily available right now at most winter farmers markets.
•4 ounces feta cheese, crumbled
Preheat the oven to 425 degrees F. Trim the ends of the onions, leaving the skins on, and cut them in half horizontally. Put the onions, cut-side up, in a baking dish just large enough to hold them in a single layer. Drizzle with 3 tablespoons of the oil; scatter with thyme sprigs and season with salt and pepper. Add 2 cups of water, cover with foil, and bake for 1 hour. Remove the foil and bake, basting with the pan juices until the edges of the onions are browned, about 45 minutes to 1 hour more. (Add more water if pan is running dry.) Remove from the oven and cool.
Smash the garlic clove with aknife. In a large skillet, heat 2 tablespoons oil over medium heat, add the garlic and stir until golden, about 3 minutes. Remove the garlic and discard. Working in batches, add the spinach, stirring to wilt before each addition. When all the spinach has been added, raise the heat to high, season with salt and pepper, and stir to combine. Cover and cook until fully wilted, about 3 minutes. Remove from the heat and drain. When cool enough to handle, squeeze as much liquid from the spinach as possible and coarsely chop. Lower the oven heat to 350 degrees F. Scoop out the center of each onion, leaving at least half an inch of the outer rings, to make onion "bowls". Coarsely chop half of the onion centers, and reserve the remaining for another use. In a mixing bowl combine the chopped onion, spinach, lemon zest, eggs, cayenne, breadcrumbs, chopped thyme, and feta cheese. Season with salt and pepper. Divide the mixture evenly among the scooped-out onions. Drizzle the tops with the remaining olive oil and bake for 30 minutes. Serve hot or at room temperature.
Butternut Squash Pasta Bake (from: www.naturallyella.com)
This is a simple, easy and healthy dish that uses another favorite and available winter vegetable-butternut squash. Bake it in individual crocks or as a large casserole. Either way I am sure it will be delicious.
Preheat oven to 425?. Cut butternut squash in half and scoop out the seeds. Place the cut sides down in a large baking dish and fill with ¼" water. Bake butternut squash until tender, 45-55 minutes. Remove from oven and let cool slightly. While the squash bakes, bring a pot of water to a boil with a pinch of salt. Add pasta and cook until just tender. Drain and set aside. Reduce oven to 375?.
From the butternut squash, measure out 2 cups of the squash. Place in a food processor along the shallot, sage, salt, and pepper. Pulse until squash is smooth. Add in vegetable broth and pulse until well combined. In a small baking dish, place ? of the squash puree in the bottom. Add ½ the noodles followed by the ricotta. Top the ricotta with the next ? of the sauce, then the remaining noodles. Finish with remaining sauce and shredded mozzarella. Bake pasta for 25-30 minutes at 375?. Cheese should be browning. Remove and serve warm. Serves 2-4
*This dish would work well with any type of squash puree, pumpkin, sweet potatoesor pasta
*For more flavor, blue cheese or gorgonzola can be used in place of ricotta
Support Your Local Farmer and Remember…
Buy Local and Buy Often…..