09 Apr Tue 2013
Why Chickens?

We have chickens! Why raise chickens? I’m so glad you asked! If you live in the city or the suburbs or think chickens are gross or too much work or you just can’t do it because you don’t know enough or or or… this post is for you. There are lots of benefits to raising chickens. Add in the fact that chickens are relatively easy and inexpensive to care for and you just might change your mind.
Reasons to Raise Chickens
First, naturally raised eggs taste better. Of course this point is completely subjective, but I have consistently noticed that naturally raised eggs are darker in color. In my opinion, they are also more flavorful than the standard white dozen we used to buy from the grocery store. (I also happen to think that naturally raised chicken meat is tastier too!)
Naturally raised eggs are healthier. According to www.backyardchickens.com, backyard eggs contain:
- 1/3 the Cholesterol of store bought eggs
- 2/3 more vitamin A
- 1/4 less saturated fat
- 2 times the amount of Omega 3 fatty acids
- 3 times the amount of Vitamin E
- 7 times more Beta Carotene
Chickens are family-friendly, low-maintenance pets.
Chickens are great pest-control assistants! They eat pretty much any kind of bug. If you’re looking for a way to get rid of insects in or around your garden, or if you have a specific pest issue to address (such as termites or fleas), adding chickens to your backyard is a natural, chemical-free, low-cost way to kiss those buggies goodbye!
Chickens are also great at weeding. Chickens love to eat… if you have an area that needs weeding, let chickens loose; they’ll turn your patch of weeds into a salad. (Be careful – your chickens don’t know the difference between what you call “weeds” and what you call “lettuce.” We’ll talk later in the week about how to safely incorporate chickens into your garden and yard without sacrificing the plants you actually want keep.)
In addition to all of that, chickens can provide you with effective, natural fertilizer for your yard and garden. Chicken manure has great levels of nitrogen, phosphorus and potassium, all of which are essential for proper plant growth. Because of the high amounts of nitrogen, chicken manure is too “hot” to use directly in your garden. Chicken owners should compost their birds’ manure to breakdown potentially harmful pathogens and render the manure safe as a fertilizer or soil amendment. If you compost your chicken manure in a pile, you’ll need to wait 6 to 12 months before you use it in the garden. If you turn the pile once a week, you may be able to use it as early as 4 to 6 months. Another way to compost your chicken manure is the use the deep bedding method in your chicken coop. We’ll talk about that more later in the week as well, but if you just can’t stand to wait, you can find out more by clicking here.
Raising your own eggs (and potentially meat) and fertilizer can save a gardening family a good chunk of cash throughout the year.
Why We Are Raising Chickens
At Arcadia Farms we desire to keep chickens for several reasons. One of the chief reasons is that the ability to gather naturally-raised eggs from our backyard contributes to the physical and financial health of our family. Another reason is that the symbiotic relationships of chickens to other areas of our farm provide environmental health and cost-savings for our operation. (As I mentioned above, properly composted chicken manure provides fertilizer for our gardens and as omnivores who eat bugs, chickens provide additional pest control to our property.)
Choosing Birds
I’m no chicken expert. So as a newbie I discovered quickly that there are many, many breeds to select from. After some research we initially wanted to purchase Orpingtons (Buff or Blue) but ended up with ISA Reds. These breeds are considered good choices for suburban settings because they are very docile and make less noise than other breeds. They are also known to be good-to-excellent egg layers.
If you’re interested in raising chickens but have no idea where to start, check out this Which Chicken? Breed Selector Tool resource from www.mypetchicken.com. For more super-helpful information check out About.com’s Small Farm guide to Choosing Chicken Breeds by clicking here. And just in case you’re as wet behind the ears as I am was about the world of chicken’s, here is a glossary of chicken-related terms provided by Tractor Supply Company (click on the image below). You’ll probably want to start here so that you better understand the terms used by the other references listed above.

Source: tractorsupply.com via Arcadia on Pinterest
Can You Have Chickens?
If you live in Portage, MI and are interested in taking the next step, click here for local ordinance information. For those of you in other communities, be sure to check with your local municipality about the application of ordinances to your ability to keep chickens.
There may be other reasons to raise your own chickens. Can you think of any? Do you have any questions about raising your own chickens?
Did you enjoy this article? Visit www.arcadia-farms.net for more info on eating healthy, saving money and buying locally.
Common Ingredient Substitues List
Guess what I found this morning? A fabulous list of common ingredient substitutes courtesy of www.allrecipes.com!
For the list click on the image below. (Don’t be fooled by the picture… the list is a lot longer than just these three ingredients.)

Source: allrecipes.com via Arcadia on Pinterest
Did you enjoy this article? Visit www.arcadia-farms.net for more info on eating healthy, saving money and buying locally.
08 Apr Mon 2013
Chicken Week (Psst! We Have Chickens!)
Guess what? We have chickens!

We are the proud owners of six ISA Red egg-laying hens who are six weeks old as of today! If all goes well, they’ll be supplying us with fresh, brown eggs by the end of the summer. We selected ISA Reds because they are docile, quiet and good egg layers. Those traits make them a good fit for our suburban setting and our need for a family-friendly flock. Our girls came from Tractor Supply Company on Shaver Road in Portage. Here’s a tip I learned from one of the TSC employees: If you show up the day before the next batch of chicks are scheduled to come in, they’ll sell you the week-old chicks at a discounted rate to make room for the newbies. So you spend less AND TSC nurses your chicks through the first week where some chicks tend not to make it. The chicks were origianly $2.99 and I paid $1.00 for each of them. Winner winner chicken… well… *ahem*.

When I was growing up, my aunt raised chickens and turkeys (Hi Aunt Bonny!) so I have a general idea of how to chase care for them. But as an adult, I have to admit I was (am?) a wee bit clueless about what goes into raising healthy birds. I’ve heard that chickens are super easy to care for so I set out to learn how and why. I started my search for chicken knowledge on the good ol’ world wide web. I found lots of helpful info at www.backyardchickens.com, About.com’s Small Farm pages and a few other blogs which I’ve saved to our Chickens board on Pinterest.
But by far the most helpful information I found came from the forums at www.permies.com. (If you’re interested in sustainable living, the information – and support – in these forums will make you drool. Grab a napkin and go check it out!) This website was created by Paul Wheaton (dubbed the Duke of Permaculture) and provides an avenue for him to share his knowledge on the subject as well for others to contribute. In this ongoing forum post, Paul describes five ways to raise chickens (coop and run, chicken tractor, truly free range, pastured poultry in pens and pastured poultry in paddocks) and then provides compelling arguments for why pastured poultry in paddocks is THE way to go. This info helped me think outside the box regarding how to raise our chickens in a manner that is healthiest for them and ultimately for us. I’m working on putting my own this-farm-is-in-the-suburbs-and-needs-to-look-nice-without-costing-a-lot spin on it. More on that later this week…

Source: motherearthnews.com via Pieter on Pinterest
In addition to information and inspiration from Paul Wheaton (and other permies), I also received great practical and design advice from the book Free Range Chicken Gardens by Jessi Bloom. To be honest, I’m a sucker for packaging, and it was originally the beautiful front cover that compelled me to check this book out. The whole thing is full of brilliant coffee-table-worthy photos but thankfully the book itself is worth as much as the pictures. This book provides a practical overview of how to raise chicks to become healthy chickens along with detailed advice on how to design your yard to meet your chicken’s needs without sacrificing style or function. I’m glad it’s in my micro-farm library!

Source: timberpress.com via Arcadia on Pinterest
Now that I’ve gathered all of this great info on chicken-keeping, I’m no expert, but I am a well-armed newbie! In celebration of our girls’ first week living outdoors, I hereby dub this week “Chicken Week” at Arcadia Farms and plan to share all of my new-found poultry insight with you. If you’ve been thinking about raising backyard chickens but have wondered what it will really entail, come back for more throughout the week as I share with you both what I’ve learned from experts and what I’ve experienced in real life. I’ll be talking about:
- Why we decided to raise backyard chickens (and why you should consider it too)
- Which birds make good urban or suburban chickens
- How to care for baby chicks
- Designing a chicken-friendly garden/yard in the suburbs
- Reducing (or eliminating!) the cost of chicken feed
- Building a chicken coop (ours cost $0!)
Also on our Facebook page we’re running a contest this week where you get to help us name one of our hens. Stop by and vote for your favorite name (or make a suggestion of your own) and then please stop by Friday to see who wins!
I can’t wait to share Chicken Week with you!
Did you enjoy this article? Visit www.arcadia-farms.net for more info on eating healthy, saving money and buying locally.
05 Apr Fri 2013
Planting Herbs in Upcycled Tin Cans
This winter I shared with you that I want a beautiful, traditionally styled, super-sized tea garden full of straight-up tea plant (Camellia sinensis) hedges and oodles of herbs. Despite my grandest dreams, our micro-farm only has room for a micro tea garden. So instead of having something like this…

{Image Credit}
www.dnalandscape.com
I’m going to have something like this…

{Image Credit}
http://fotofraulein.blogspot.com
I’ll be growing herbs for tea in upcycled tin cans which will hang from the posts of our garden fence. I’m also hoping to add some herb containers closer to the house. This weekend I got started on planting my first herbs – stevia.
For those of you who aren’t familiar with stevia, it is a natural sweetening alternative to cane sugar. I’m going to use the leaves in tea but you can also use it in powder form for baking. (Personally, I’m not a huge fan of the aftertaste it leaves in baked goods.) I’m starting small with just five containers. Here’s what I did.
I’ve been collecting an assortment of tin cans all year. I grabbed five of them and used a drill to make holes in the bottom. Because stevia likes well-drained soil, I wanted to add a little something to the bottom of each can to create air pockets for drainage. What better to use than some of the myriad twigs lying around my yard? Cleans my yard up a smidge (ok, a very tiny smidge), makes good use of what would otherwise be yard waste and creates a mini-hugelkultur climate in my herb containers. Win win win!

I started by drilling drainage holes in the bottoms of my tin cans.

Next I added a layer of fallen twigs. These will aid in drainage by creating air pockets and will also add a hugelkultur effect to these tiny planters.

I’m planting stevia from Seed Savers Exchange in these mini-planters.
I’ve never grown stevia before… can’t wait to see (and taste) what lies ahead! And I’m super excited about all the other tea-worthy herbs that are yet to come.
Did you enjoy this article? Visit www.arcadia-farms.net for more info on eating healthy, saving money and buying locally.
Chitting (Sprouting) Seed Potatoes

Our seed potatoes came yesterday! I ordered certified organic Nicola and Desiree seed potatoes from Seed Savers Exchange and can’t wait to get them planted! (I also ordered sweet potatoes from Annie’s Heirloom Seeds and expect they’ll be coming soon as well.)
This year before I plant my potatoes I’m going to chit some of them. No, I didn’t just cuss at you. Chitting potatoes is the act of sprouting them before they are planted. This is my first year trying it out, but those who’ve done it before say you can harvest your taters up to three weeks early if you follow these steps. Here’s a quick tutorial.
Chitting Potatoes – A How-To Guide
- Start the process 3-4 weeks before you’re ready to plant the potatoes in the ground
- Place the potatoes in a bright location (sunny windowsill or under a florescent/grow lamp)
- Sprouts will emerge. Try to keep the potatoes stable so that these sprouts don’t get broken. Placing the potatoes in an open egg carton would do the trick.
- Plant the sprouted potatoes just like you would plant them without sprouts. Just like you plant regular potatoes withe eyes facing up, plant these with the sprouts facing up.
Did you enjoy this article? Visit www.arcadia-farms.net for more info on eating healthy, saving money and buying locally.
04 Apr Thu 2013
Soaking Seeds

If you’re not into starting seeds, my gardening posts have probably sounded like a boring broken record this winter. I can’t help it… getting the most out of a Michigan growing season partially hinges on how and when you start your seeds. Now is a great time to start seeds for your home garden. (Not sure you can grow a garden where you are? I’d love to help you create a FREE custom plan that you CAN do! Email me: katie@arcadia-farms.net) I’ve shared lots of info on seed starting, including post 1, post 2, post 3 and post 4. All the same, I wanted to talk to you about one other helpful seed-starting tip: soaking seeds.
Why Soak Seeds?
Soaking seeds before planting speeds up germination by stirring up the process of the dormant baby plant inside the seed’s hull coming to life. If you think about it, seeds are designed to withstand all that nature can throw at it – wind, cold, heat, animals, etc. Because of this, they have some natural defenses designed to keep them intact until they meet the right soil, water and heat conditions to begin growing. In nature, seeds get roughed up before they grow. In your garden, they’re relatively coddled compared to their wild relatives. Plus once they get covered by dirt, the soil wicks away some of the moisture needed to start the growing process. Pre-soaking your seeds gives them all the water they need to get a jump start on life.
How to Soak Seeds
The process is pretty easy. Start with very warm tap water. Add the seeds directly and let them do their thing. The web is fully of inconclusive advice about how long seeds should soak. Here are the guidelines you should operate within. First, the bigger the seed and the harder the hull (shell), the longer they should be soaked. Second, you shouldn’t let you seeds soak for more than 24 hours because taking on too much water can make them rot. Turns out the old school practice of soaking seeds – like many other parts of gardening the way Grandma used to – is more art than science. You’ll have to experiment with how long to soak your seeds (use your garden journal to keep track of the results!). I’m aiming to soak seeds between 8 and 12 hours depending on the size of the hull.
Which Seeds Should I Soak
Because the purpose of soaking seeds is to break through that hard protective outer shell and to give the seed a good healthy drink before it is planted, small seeds are probably not good candidates for soaking. Small seeds – such as carrot and tomato – might benefit from 15-30 minutes of soaking but are too small to soak for a long period of time. On the flip side, pumpkin, cucumber, peas and beans will benefit from a good, long soaking (no more than 24 hours). Beet seeds and the like fall into the middle of the range and might be soaked for more like 4-8 hours.
Just like the “How to soak seeds?” question the answer to “Which seeds should I soak?” is inconclusive. Experienced seed-soaker Sally Roth offers this advice in her article about seed soaking at http://www.finegardening.com:
“I presoak just about everything except for the tiniest seeds. But I’m always careful not to presoak my seeds until the night before planting them in pots or in the garden. Once the seeds have swollen, get them into moist soil immediately, then keep them well watered until they’re up and growing. This simple technique can shave several days off the usual germination time.”
Anyone else out there have experience with and advice on soaking seeds?
03 Apr Wed 2013
Planting Experimental Potatoes
Since it didn’t snow yesterday (yes!) I spent some time planting potatoes and lettuce in the main garden. Lettuce will go in under plastic row covers in some of our narrow beds (2' x 12'), along with spinach which overwintered and is already growing. I’m scheduled to plant lettuce in two additional narrow beds on the hugelkultur side of the garden… the problem is, they’ve not yet been built. (This past December we put in 4' x 12' hugelkultur beds but skipped the 2' x 12's since they were too narrow to dig with the bobcat.) I guess I better grab my shovel and get on that…
Meanwhile, I cleared a blanket of leaves that have been keeping fall-planted onions sung over the winter.

I cleared away a layer of leaves that have been protecting fall-planted onions through the winter.

Fall-planted onions debuting for spring.
I was also able to plant some taters. These are ‘experimental’ potatoes in that:
- I’m planting eyes from spuds we purchased at the grocery store.
- I’m planting them in hay.
- I’m planting them outside the fence, intermingled with garlic in hopes that the deer will be deterred by the garlicky smell.
Planting from Potatoes that Sprout in the Cupboard
From everything I’ve read, the most reliable way to get great potatoes is by buying seed potatoes. That’s because some potatoes you buy at the grocery store have been sprayed with a chemical sprout inhibitor to keep them looking tip-top on the grocery shelf. Despite all of this sound advice, the potatoes we grew in our very first garden came from store-bought potatoes… and they were delicious! We typically buy organic potatoes so I thought I’d give it a whirl. Fortunately twice now I’ve discovered forgotten potatoes in the pantry with some hefty eyes on them. In one case I was able to simply cut the eyes out, store them in a brown paper bag, and use the potatoes for dinner. The other time they were way too far gone to be eaten. This afternoon I planted those whole. No waste here!
Planting Potatoes in Hay
Ever heard of planting potatoes in hay? The benefit is that its easy to “mound” the potatoes with more soil (ok, hay really) and its super easy to dig the potatoes up when they are ready to harvest. The danger in planting with hay (or straw) is that you have to make sure the potatoes stay covered so that no light gets to them. Potatoes exposed to too much sun will go green and become toxic. (Don’t eat green potatoes!) I planted our “experimental” potatoes in 1 foot deep holes outside the Main Garden fence and piled on about 8-10" of composted waste hay from Nacho’s (the bunny) cage. Nacho’s hay (and poo) has been composting all winter in a special bin. I think the recent sunshine has kicked the process into overtime because a good deal of it has already turned into soil.

This potato started sprouting in our pantry. Now its growing underneath composted waste hay.
At any rate, here’s a video about how and why to plant potatoes in hay.
Keeping Taters Safe from Critters
I’ve done some research about what deer will and won’t eat. Turns out – during cold weather when plants are scarce – they’ll eat anything green they can get to. During more abundant seasons, there are some things they’ll avoid, including onions and garlic. I’m interested in growing lots of storage potatoes this year but just don’t have the kind of room I need in our raised beds. So I decided to do a little experiment and place a few potato plants between sections of garlic. So now on the west side of the Main Garden I have alternating plantings along the fence – about four feet of garlic (which is coming up beautifully already!) and about four feet of potato plants (1 per square foot). I plan to direct seed a few scallions in with the potatoes for extra insurance. Here’s hoping these city deer won’t get too curious!

Our garlic is coming up! It’s going to be a good spring.
Anyone out there have advice on how to best grow potatoes? Have you tried planting in hay or straw? I’d love to hear your thoughts!
Did you enjoy this article? Visit www.arcadia-farms.net for more info on eating healthy, saving money and buying locally.
01 Apr Mon 2013
Early Spring 2013 Update
NOTE: Ooops! Somehow I managed to only save this as a draft and did not publish it. This was supposed to be posted on April 1 (no joke). Keep that in mind as you read my "today"s and "yesterday"s. - Farmer Katie
Today’s Headline: No snow… (yet)! Today’s forecast for southwest Michigan was snowy. To be sure, it is cold outside (hovering around 30 degrees as I write this) but the sun is shining brightly. After a sustained string of sunny days, it’s a little hard for me to stomach the idea of snow. The good news is that Wednesday should be sunny and relatively warm (40’s) and then if the Mr. Weatherman is right, there’s no looking back! Farewell, winter – I’m ready for spring!Our First Hugelkultur Planting
With spring on our doorstep, I’ve been super busy starting seeds. On Good Friday I planted about half of our peas. The most exciting thing about these peas is that they are the very first thing planted in one of our hugelkultur beds! To recap, the beds are comprised of pits (about 3’ deep) filled with rotted logs, branches and fall leaves which have then been topped with the very earth that was removed to make the pits. (For in-depth info on why in the world we would bury logs in our garden – and why you should too – click here.) On Friday I made a mound about 8-10” high with more topsoil and topped that with 6 cubic feet of organic garden soil (purchased from Lowes). My plan was to create the mounded part of the beds with compost but I have not yet ordered the compost. (Just like last year we’ll get it in bulk from a local supplier.) Because I knew a cold snap was coming, I covered the bed with a plastic row cover using our PVC hoops. (I had a fabulous helper!)

This hugel has 3 feet of logs and leave buried beneath it with a 8-10? mound of top soil on top.

Owen is helping me put the hoops in place for our row cover.

What a great little helper!

Hoops are in place. A covering of organic garden soil (from Lowes) tops the bed. This is only 6 cubic feet… I wish I could have added more.

The bed is ready for the row cover.

I covered the bed with plastic held down by logs and large rocks. The let the bed warm for a day before planting the peas.
The row cover will also keep the deer and other critters from digging up my peas since there we do not yet have a fence around this part of the garden.
Seedlings
To date I’ve started onions, leeks, cabbage, cauliflower, kale, rhubarb, chard, broccoli, stevia, lettuce, peas and tomatoes. Frankly, this is the part of the season that keeps me on edge. Starting hundreds of seeds at a time while the weather is still touch and go provides lots of challenges.

My biggest issue is space. We live in a small house and have a very small greenhouse. Finding an out of the way place for so many seedlings that also has the warmth and light they need is difficult. Second of all, making sure I stick with my planned planting dates is hard for me. Life gets busy and despite the fact that I vowed not to do this again, I’ve already had a couple of days where I look at the calendar at 8:00 PM and think “Oh crap, I’m supposed to plant 200 seeds today!” Right now I’m way off schedule on planting chives, scallions and a few days off on lettuce, spinach and chamomile. The biggest issue is that I haven’t been diligent about making newspaper pots every day. The good news is I think I can go ahead later this week with direct seeding my chives and scallions (they are cool hardy) and I’m thinking of direct-seeding the lettuce and spinach under row covers. The only reason I was going to start chamomile this early is because it takes a while to mature and I wanted to give it a jump start. But since that is not a critical crop for our CSA, I think I will just direct seed it after the last frost date.
In further keeping-it-real news, my onions are not doing well. I planted about 450 seeds and I think about 30% of them are thriving. I think the culprit here is lack of light… they’ve been hanging out in my laundry room and there are so many that some are not in the best-lit places. Also my cauliflower and cabbage have not germinated well because they are in the greenhouse which drops down to about 50* at night despite my space-heater’s best efforts. I replanted cauliflower a couple of days ago and will be bringing those seedlings, along with the cabbage, inside to germinate. The good news is our kale is doing fabulously as well as our chard. Broccoli germinated just fine and the tomatoes are coming along. Once the night temperatures pick up (or I get my hands on a second space heater) we should have no problems.

Later this week I’m hoping to build shelves for the greenhouse to make better use of space (and get seedlings out of my dimly lit laundry room!)
The Garden Fence
Now that the direct-seed season has arrived (at least for my cool-hardy plants) we need a new fence ASAP. For those of you who are just starting to follow us, you might want to check out this post where I talked about expanding our garden. We’ve doubled the size of the Main Garden by adding 14 new beds – 10 of them are hugelkultur beds. The existing fence is still standing around last year’s garden. Besides needing to be expanded, it also needs to be improved. The posts are loose in several places and there are gaps (like, fawn-sized gaps) in the metal fabric in a couple of places.


Oh look – a fawn-sized hole in the fence… lovely…
Last fall I shared with our CSA members that we could use help in April with building the new fence. Several of them graciously said that they’d be willing to help when the time arrives. (Thank you!) We haven’t set a date yet but will soon. The fence will serve several purposes: Protect veggies from critters (like deer and rabbits), allow sun to reach our crops (by using welded wire fencing), provide a trellis to the north of the garden and create an attractive boundary for the garden. The attractive boundary is a driving force behind our need for some additional help, of the financial variety. Being good neighbors is important to us and since we’re a suburban farm, we want to create a fence that is as aesthetically pleasing (for our neighbors) as it is effective (for our crops). To make a prettier fence, we need a prettier penny. (And since we’re a start-up farm committed to operating debt-free, the budget is tight.)
The good news is that we’ve found a way to make a fence that is relatively low cost while still serving all the purposes listed above. And we’ll be able to make it modular so if we need to expand or move it in the future, all of the dollars invested in our project will not go to waste. All contributions (even $5) will bolster our ability to provide naturally-grown, locally-sold produce to our community. If you’re interested in investing in the naturally-grown, buy-local movement, here’s a great opportunity to make a tangible difference for just a few dollars! If you’d like to contribute, please email me at katie@arcadia-farms.net. (P.S. We’re giving away some pretty cool rewards to contributors. More details coming within a few days on our very first www.kickstarter.com project!)
Here are some pictures to give you an idea of what we’ll be building.

{Image Credit}
www.prowellwoodworks.com

{Image Credit}
www.onhome.org

{Image Credit}
http://mnkyimages.com
There you have it… a little peak into the world of what we’ve been up to lately. What have you been up to around your homestead? Have you started any seeds indoors? Outdoors? Any other gardening activity? I’d love to hear what you’re up to!
Did you enjoy this article? Visit www.arcadia-farms.net for more info on eating healthy, saving money and buying locally.
29 Mar Fri 2013
Homemade Pure Maple Syrup Part 2
Last week I shared that we’ve been collecting maple sap for making our own maple syrup. It has been a great family-time endeavor and the first step – collecting maple sap – couldn’t be simpler. To learn how to collect your own maple sap, click here.
Our first batch of sap (10 gallons) has already been turned into 3 pints of golden, delicious maple syrup. (And a pint of that maple syrup has already found its way into a batch of oatmeal cookies!)

The first batch of syrup from Arcadia Farms!
From my perspective, the second part of the process (boiling sap to convert it to maple syrup) has been pretty easy too. That’s because my father-in-law (hereafter lovingly referred to as “Papa”) did all the work. This is Papa’s third year making homemade maple syrup and he’s figure out a thing or two about how to make it work. You can learn from his experience (along with other tidbits I’ve gathered from the web and a book called Backyard Sugarin’: A Complete How-To Guide by Rink Mann) to discover how to make your own syrup too.
To start, I’d like to give you a general overview of how the sap-to-syrup process works. Put simply, you need to:
- Collect sap from maple trees.
- Boil sap so that the water evaporates and the sugary syrup remains.
Easy-peasy, right? Essentially, it is. But there are nuances to boiling sap that are critical to understand if you’re going to end up with maple syrup instead of a gooey, burned mess. As Rink Mann puts it:
“the process involves boiling the sap so that the water in the sap evaporates off in the form of steam, leaving the sugar behind in the boiling pan. Sounds simple, doesn’t it, and it really is, although at certain stages of the process , particularly as you’re getting your brew close to being syrup, there can be terrifying moments. Remember, we’re talking about starting with, say, 33 gallons of sap and ending with 1 gallon of syrup.”
Click here for the rest of this article, which includes the following info:
- Sap storage
- Making an evaporator (includes videos)
- Boiling sap (more videos)
- Filtering syrup
- Storing syrup (and... more video)
25 Mar Mon 2013
10 Ways to Save Money on Food

If your household is similar to ours, the grocery slice of the budget pie is sizable enough to get your attention. Most “experts” recommend budgeting 14-20% of your take home pay for food (groceries, lattes, eating at restaurants, etc.). A recent study shows however that Americans are spending less on average than ever before on groceries – 11% of income. That might sound like good news, but consider the story behind the numbers.
A separate study from 2012 shows that while prices – for meat in particular – have gone down, American consumption has in fact gone up or remained the same. What happened? The advent of the factory-farm has succeeded in pushing the price of meat way down. A 2012 article by Tom Philpott (The American Diet in 1 Chart) explains the phenomenon well:
“American eaters have gotten a windfall from the the era of cheap meat that dawned in the early ’80s. Meat prices tumbled as small farms shuttered, to be replaced by massive factory-scale farms that stuffed animals with cheap, subsidized corn and soy and kept them alive and growing to slaughter weight with daily doses of antibiotics. Regulators looked the other way as these gigantic facilities created messes they didn’t have to pay to clean up. Meanwhile, as Mother Jones’ Ted Genoways showed in his blockbuster piece last year on Hormel, corporate meatpackers managed to bust unions, speed up kill lines, and drive down employee wages. It all added up to bargain-priced meat.”

Source: Bureau of Labor Statistics
Credit: Lam Thuy Vo / NPR
Consequently, our consumption of processed (read: cheap) food has skyrocketed. In 1982, 11.6% of a family’s budget was spent on processed food and sweets. Today processed food tops the budget break down at 22.9% of the budget, followed by meat (21.5%), fruits and veggies (14.6%), Grains and Baked goods (14.4%), beverages (11.1%) and dairy products (10.6%). So in layman’s terms, we spend less money on food now because the bulk of our diet is ‘food’ processed and engineered with more regard to its cost than its quality.
Save Money, Eat Healthy
So what do you do if you’re interested in saving money AND eating healthy? Don’t despair – here are some tips.
Cook at Home
When you buy pre-packaged food or eat at a restaurant, you’re paying for more than just the ingredients you consume. (Someone has to pay to keep the lights on, right?) With practice, cooking at home can be just as delicious (sometimes more delicious!) than eating out. Eating at home can save you up to $2,600 a year! And with some savvy, budget-friendly tips (like the tips you’re about to read) you can save even more money! If you’ve never been much of a cook, don’t let that stop you. (Everyone has to start somewhere, right?) I recommend beginning your journey into homemade meals by using a crock pot. It’s so easy – I promise – and the great-tasting meals you produce will give you a boost of confidence to try something new!
Make a Plan
Like a lot of things in life, it’s hard to win without a plan. Your grocery plan starts long before you jump in the car to head to Meijer. Here are some tips. First, keep a pad of paper in an accessible area (on the side of the fridge?) so that you can keep track of grocery needs on an ongoing basis. Did you use the last of the olive oil? Write it down now so you don’t forget it later. The next two tips go hand-in-hand – make a menu and check for sales. Making a menu (meal planning) helps you make purchases that will form complete meals rather than buying a bunch of things that sound good but don’t add up to a complete meal. Having a pre-made meal plan saves time as well because you don’t have to figure out what to make each night. Planning a menu around what’s on sale will naturally save you money. The next tip is to take stock of what you already have so you don’t buy unnecessary duplicates. All of this should be complete by the night before you’re going shopping: Menu created (check!); Inventory taken (check!); List created (check!). Now when you get to the store, you’ll be able to stick to your list without worrying that you’ve forgotten something, and perhaps with a little more resolve to skip over impulse buys! (You can also decrease impulse purchases – like a candy bar at the checkout aisle – by having a small snack before you go shopping).

Buy (and Preserve) Produce In-Season
There are lots of great reasons to buy produce when it is in-season. First of all, the taste is so much better than out-of-season veggies that you may never want to go back! Second, buying in-season, local produce (check out your local farmers market) is great for your community and area farmers. And third of all, it costs less to buy food in-season than it does to buy it when it has to be grown hundreds of miles away and shipped to you through the snow. And if you team up with tip #9 below, you could save even more money at the farmer’s market; Many sellers are willing to give you a discount for buying large amounts of produce if you ask politely. Worried about what you’ll do with all those [fill in the blank here]? If you can’t eat it all now, preserve some of it! Can it, freeze it, dry it. Don’t be intimidated – you can find tons of how-to help on the web (or by asking your Grandma). Then in January when you want wholesome [fill in the blank here] you can skip the trucked-in-from-California produce section of your grocery store and turn to your pantry instead.
Use Sales and Coupons
I confess – I missed the Extreme Couponing movement. I’m not coupon-wielding expert, but I do know that the Sunday paper is full of coupons. As long as those coupons are for things you will actually use, you can save money by using them. Consider taking advantage of frequency type clubs for items you usually buy or places you usually shop (i.e. “buy 10 get the 11th free”). Meijer has a great website (and a great app for your mobile device) for looking up sales. Planning meals around what’s on sale can save you big bucks. If you can swing it, try keeping a “Sale Fund” set aside (perhaps $50 or $100) so that when a great sale comes up, you can stock up and fill your freezer. (Earlier this year we scored some unbelievable Buy One, Get Two type deals at Harding’s… our freezer has never been so full of meat!) Just remember – using a coupon to buy something you otherwise wouldn’t buy doesn’t save you money, even if you get 10% off.
Buy in Bulk
Our favorite place to buy in bulk is from Country Life Natural Foods in Pullman, MI. It’s quite a drive (about an hour) from our home in South Portage, but if you buy several things at once, the trip is worthwhile. We’ve saved money on organic Quinoa (a year’s supply for $30), a year’s worth of honey (1 gallon for $38.50) and 7 pounds of coconut oil ($12.90). They have practically everything you can think of and some of it is Michigan-made. Check out their catalog here. To save even more money, carpool with a friend (thanks Darci!) or take orders from each other and take turns doing the pick up. I’ve never tried it but apparently they also deliver for certain order sizes. We also now save money by buying our herbs and spices in bulk at Sawall Health Foods in Kalamazoo.
Leftovers? What Leftovers?
A great way to save on food is to avoid wasting it. Plan your meals to make the most of leftovers. Here’s an example from our life: Every other Sunday we have a roasted chicken for dinner with carrots, potatoes, peas, beans, onions or other in-season veggies. Monday I use the leftover chicken and veggies in a meal like chicken salad over spinach or a chicken pot pie. After that, I turn the chicken carcass into stock and make soup with it (sometimes using remaining veggies from Sunday’s roast). Even sour milk can be saved from going to waste! You can’t stretch everything that far, but there are lots of leftovers that would go great in an omelet, a salad or soup. If all else fails, send unwanted leftovers to the compost bin rather than the garbage can.
Brown Bag Lunch

A great way to bloat your food budget is to eat out for lunch every day. When my day job involved working from an office instead of working from my living room I discovered some tips to making the brown bag lunch work. I don’t know about you, but there were typically three reasons why I ate lunch at a restaurant instead of from a lunch bag. The biggest hurdle to jump is just remembering to bring a lunch. If you’re serious about saving money, taking a few minutes the night before to pack tomorrow’s lunch is key. Another issue: What’s in the bag just doesn’t sound appetizing. The simplest way to avoid that conundrum is to bring food you’ll look forward to eating! My main way of addressing this was to make fabulous dinners and make sure there were always leftovers for tomorrow’s lunch. The other reason I skipped a bagged lunch was because I just needed to get out of the office! In warm weather, you can accomplish the same thing by taking your lunch to a nearby park. In yucky weather, sometimes just sitting in your car provides enough peace and quiet to count as “getting away.” I also made sure to bring or keep healthy snacks at work to curb my desire to buy a little something in the afternoon. I always had something sweet (yogurt, a cucumber, dried fruit, etc.) and something salty (crackers, mixed nuts, etc.) on hand to keep my snacking healthy and cheap.You could save more money by stashing homemade snacks like granola.
Frozen and Dried
Frozen and dried fruits and vegetables are less expensive than fresh and in some cases contain the same amount of nutrients. Resealable packaging helps you avoid waste. For tips on how to store frozen vegetables so they keep as long as possible, click here.
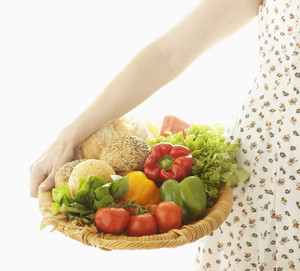
Use Cheaper Protein
Meat is expensive. If beef and chicken are choking your budget, try getting your protein in other ways such as beans, eggs, quinoa or legumes. If you grow your own (including raising backyard chickens for eggs) think of all the money you could save by opting for non-meat alternatives. For fabulous egg recipes, click here.
Shop at Home

Starting this spring, we hope to transition to a family that produces more of our food rather than buying it elsewhere. What if you could remove vegetables, fruit and herbs from your grocery list because you’re shopping in the backyard? Now think about what a difference it would make to take eggs, milk, cheese, butter, yogurt, bread and maybe even meat off the list? We may not all be able to raise our own meat birds or raise goats for milk, but almost everyone (even apartment dwellers) can grow fresh herbs and vegetables. By using an intensive planting method (like Square Foot Gardening) you can grow a surprising amount of food in a small space. Start small with a garden size you’ll be able to easily manage. I think you’ll be amazed at how much you get – and how much you’ll save!
Did you enjoy this article? Visit www.arcadia-farms.net for more info on eating healthy, saving money and buying locally.
23 Mar Sat 2013
Benefits of Gardening
If you’re a gardener, you know that gardening brings more than just fresh veggies into your life. Spending some time outdoors, digging in the dirt and tending to your plants can merit health, mental, financial and communitybenefits. Here’s a ‘lil infographic to illustrate the point. (Click on the image below to enlarge it)

{Image Credit}
www.lochnesswatergardens.com
22 Mar Fri 2013
Celebrate Easter Without Sugar

Easter is coming! On Sunday March 31 our family will be celebrating the resurrection of Jesus Christ. While the Easter Bunny doesn’t make an appearance during our celebration (we prefer to shoot any giant rodents found sneaking into the house) we do incorporate things like Easter baskets, dyed eggs and getting all dressed up to have breakfast with our friends and family at church. Since we’re focused on avoiding processed food and artificial dyes, I spent some time looking for more natural ways to fill Owen’s basket this year. Here are some celebration ideas your family can use as well.
{P.S. I hope to make Owen’s basket as local as possible. If I have time, I’ll post pictures and sources for Owen’s local-centric Easter basket before the big day!}
Naturally Dyed Easter Eggs
Artificial dye is poison. Did you know that some artificial dyes are banned from inclusion in our cosmetics and medicines, yet food manufacturers are permitted to include them in our food? Many of these same substances are banned in other countries. Why? Because they have been linked to health issues like cancer and hyperactivity in children. For more info on the hazards of artificial dyes (and ideas for natural food dyes) click here. For more on how to dye your Easter eggs naturally, check out the video below.
Cake (Pancake?) Filled Eggs
Another fun surprise you could put together would be baking cupcakes inside real egg shells. I love this idea! Owen and I enjoyed doing this project together. We tried a little variation – first we dyed the eggs, then we baked the cupcakes inside them. We learned that natural dyes don’t withstand the heat of baking quite as beautifully as artificial ones. (That’s why this post doesn’t feature any of our ultimately brownish-greenish cupcake eggs!) I’m going to try filling some eggs with pancakes to eat on Easter morning… we’ll see how that turns out.
We also tried a slight variation of the recipe included in the tutorial you see below. Here’s our own twist on the recipe created by the Cupcake Project.
What you’ll need:
- 9 large eggs (Only one will get used in the cake. The rest are just used for the shells.)
- 1/2 C flour
- 1/4 tsp baking powder
- 1/8 tsp baking soda
- a pinch of salt
- 1/3 C real maple syrup
- 1/4 C unsalted butter, room temperature
- 1/2 tsp homemade vanilla extract
- 1/4 C vanilla or plain yogurt
We mixed the dry and wet ingredients separately and then mixed them together with an electric mixer. Also, if you have trouble getting the egg to come out of the shell, try poking a teeny-tiny hole at the other end and blowing it out (Owen loved this… despite thinking it was disgusting). Also, my skills with a piping bag are about as great as Kanye West’s public speaking abilities, so I opted to use a medicine syringe (the kind you use for giving a toddler pain medicine) instead – worked beautifully!

{Photo Credit}
www.cupcakeproject.com
Non-Candy Easter Basket Prizes
A chocolate bunny and jelly beans are usually staple candies in an Easter basket. Here are some basket ideas that will make your kids “hoppy” without the sugar buzz-and-crash routine following typical sweets.
Sidewalk Chalk

Homemade Bubbles
Sealed container + cute label + bubble wand (check the party store) = tons of fun for little ones! What if it’s cold outside? Are you kidding – have you ever experienced the fun of frozen bubbles? Regardless of what the weather’s doing, this one is a total win!

Source: catchmyparty.com via Arcadia on Pinterest
All-Natural, Chocolate-Covered Sunflower Seeds
As yummy as they are colorful!

Homemade Treats
What kid wouldn’t like to get a stack of cookies as a gift? Try our own minimally processed (no processed sugar) cookies or perhaps some homemade granola.

Source: arcadia-farms.net via Arcadia on Pinterest

Source: babble.com via Arcadia on Pinterest
Seeds
Some plants are super easy to grow. Owen has his own garden (4 x 8 raised bed) and loves sharing cucumbers with his friends during the summer. Give your little one some cucumber, watermelon or sunflower seeds and initiate them into the wonder of spring.

Source: gardenercommunity.blogspot.com via Michelle on Pinterest
Dinosaur Egg Cucumbers… What kid wouldn’t want to go dinosaur egg hunting in his own backyard??

Source: rareseeds.com via Arcadia on Pinterest
[pin]
Stuffed Animals

Turn your child’s drawing (no matter how wild!) into a stuffed animal. So cool!

Source: childsown.com via Arcadia on Pinterest
Jump Rope
This jump rope (found on Etsy.com) is personalized.

Sports Balls
Warmer weather is coming, so give your little one something to play with outdoors. A frisbee or a kites are great too!

Source: meijer.com via Arcadia on Pinterest
Books

Source: amazon.com via Arcadia on Pinterest
Crayons
These crayons are all natural. You can find more natural crayons on Etsy.com in many shapes, sizes and colors.


Craft Supplies

All Natural Candy
Ok.It’s candy, I know. But if you absolutely can’t manage to go without giving your child sweets for Easter, why not buy allergy-sensitive, all-natural treats? Here’s a source.

Source: naturalcandystore.com via Arcadia on Pinterest
Resurrection Cookies
We’ve never made resurrection cookies before, but it’s a tradition I’ve heard about from family and friends. The recipe and baking process are used as an illustration for the story of Jesus sacrifice and resurrection. Pretty straight-forward, family-friendly stuff. We may give it a whirl this year to see if there’s a way to make it with less (or no!) sugar. For a pictures and instructions, click on the image below.

{Photo Credit}
www.motherhoodonadime.com
Did you enjoy this article? Visit www.arcadia-farms.net for more info on eating healthy, saving money and buying locally.
20 Mar Wed 2013
Wish List Wednesday | Raised Garden Bed Ideas
Wish List Wednesday | Raised Garden Beds
Welcome to another Wish List Wednesday! On the third Wednesday of every month I’m sharing about all sorts of things I’d like to have, try or know more about. So far I’ve brought you lists on things from solar-powered garden gadgets to garden apps for your mobile device. To see all of my Wish List Wednesday posts so far, click here.
Today’s wish list is all about raised garden beds – various ways to build them, along with some snazzy accessories to make garden more enjoyable. I’m a big fan of raised beds. To learn more about the advantages of gardening in raised beds, read the Try Square Foot Gardening section of this article.
Raised Bed Ideas
Herb Spiral Made with 2 x 4?s

Use a Living Hedge
For those of us who grew up in the 80?s – LOOK – we can now have a grown-up cabbage patch!

$10 Raised Beds – Made from Cedar!!

Straw-Bale Raised Beds Have Unique Advantages

19 Mar Tue 2013
You Can Make Washing Soda at Home

About a month ago I shared info on how to create your own homemade laundry detergent and fabric softener. We’ve been using this detergent since mid-February and it works great! Even though we won’t run out for months, I recently bought supplies to make another batch. This time I’m going to try making detergent with Fels Naptha soap. (I already had three bars of soap so I just needed to buy borax and washing soda).
To have a full year’s supply of homemade laundry detergent, I’m going to need to make a third batch. When I get there I’m gonna break all the rules {BWAHAHAHAHA!} and use baking soda… well… kind of…
While meandering around the world wide web checking out detergent “recipes”, I happened upon this little gem: A tutorial for making your own washing soda!
18 Mar Mon 2013
Great News!

At the beginning of this year Arcadia Farms teamed up with two other local growers to respond to a proposal for providing fresh, naturally and locally grown veggies to a local childcare facility. We’re so excited to let you know that our growers group will be providing fresh veggies to the precious little ones of Adventures Learning Centers (in Portage) as part of their Encouraging Adventurous Eaters Project! I’m really excited about veggie brokering (helping other growers sell their produce) and expect that this will be a great partnership!