10 Jun Sun 2018
Ask Arlene how to make Pumpkin Rum Ice Cream©
Ask Arlene how to make Pumpkin Rum Ice Cream©
By Arlene Wright-Correll

Ingredients:
1 cup pumpkin purée
1 cup whole milk
1 1/2 cups heavy cream
1 1/2 teaspoons pumpkin pie spice
1 teaspoon Ceylon cinnamon
Pinch of salt
1 tablespoon vanilla extract
1/4 teaspoon pumpkin flavor, optional; for enhanced flavor
4 large egg yolks
1/2 cup granulated sugar
1/2 cup brown sugar
1/4 teaspoon xanthan gum, optional; for smoother texture
2 tablespoons rum, optional; for softer ice cream and added flavor
Directions:
1) Freeze the work bowl of an ice cream maker according to the manufacturer's instructions.
2) Combine the pumpkin purée, milk, cream, spices, salt, vanilla, and pumpkin flavor in a saucepan. Set the pan over medium heat, and bring the mixture just to a boil. Remove it from the heat.
3) beat together the egg yolks, sugars, and xanthan gum until light and airy.
4) Pour half the warm pumpkin mixture slowly into the egg yolk mixture, stirring constantly.
5) Pour the yolk/pumpkin mixture back into the saucepan with the remaining pumpkin mixture. Cook over low heat, stirring with a heatproof spatula, until the custard thickens significantly; it will register between 170°F and 180°F on a digital thermometer.
6) Remove the pan from the heat, and let the custard cool to room temperature, stirring occasionally to prevent a skin from forming. Refrigerate for at least 2 hours, or overnight.
7) Transfer the custard to an ice cream maker. Freeze according to the manufacturer's instructions, adding rum at the end of the freezing process, if desired.
8) Serve immediately if you prefer soft, creamy ice cream. For firmer consistency, transfer the ice cream to an airtight container and freeze for about 2 hours.
Yield: about 1 quart.
Ice Cream Tip: Adding the rum will help keep the ice cream from turning rock-hard in the freezer.
May the Creative Force be with you as you tread the earth lightly!
Arlene Wright-Correll
07 Jun Thu 2018
Ask Arlene About Rue©
Ask Arlene About Rue©
By Arlene Wright-Correll
Recently we received this email question, “I was wondering if you know anything about the plant Rue and can I plant it here?”

Rue is an herb and it is a perennial plant that you can grow in zones 5 though 9. So we planted some in our Kentucky gardens here at Home Farm Herbery a long time ago and we sell the heirloom seeds worldwide and ship them free.
Rue has a long history of use as a domestic remedy, being especially valued for its strengthening action on the eyes. The plant contains flavonoids (notably rutin) that reduce capillary fragility, which might explain the plants reputation as an eye strengthener.
Some caution is advised in its use internally, however, since in large doses it is toxic and it can also cause miscarriages.
The whole herb is abortifacient, anthelmintic, antidote, antispasmodic, carminative, emetic, emmenagogue, expectorant, haemostatic, ophthalmic, rubefacient, strongly stimulant, mildly stomachic and uterotonic.
The tops of fresh shoots are the most active medicinally, they should be gathered before the plant flowers and can be used fresh or dried. An infusion is used in the treatment of hysterical affections, coughs, flatulence etc.
The juice of the plant has been used in treating earaches and chewing a leaf or two is said to quickly bring relief from giddiness, nervous headaches, palpitations etc.
An alkaloid found in the plant is abortifacient, anti-inflammatory and antispasmodic.
A homeopathic remedy is obtained from the fresh herb, harvested in early summer shortly before flowering begins.
This is used in the treatment of a variety of complaints including eye strain, headache and sprains. Known Medicinal Properties
Some important facts about Rue are it is used as an Abortifacient; Anthelmintic; Antidote; Anti-inflammatory; Antispasmodic; Carminative; Emetic; Emmenagogue; Expectorant; Haemostatic; Homeopathy; Ophthalmic; Rubefacient; Stimulant; Stomachic.
WARNING LABEL: Home Farm Herbery cannot take any responsibility for any adverse effects from the use of seeds and/or plants. Always seek advice from a professional before using a seed and/or plant for medicinal purposes.
“Tread the earth lightly …and may the Creative Force always be with you.
Arlene Wright-Correll
05 Jun Tue 2018
Ask Arlene about building a Holzhaufen ©
Ask Arlene about building a Holzhaufen ©
By Arlene Wright-Correll
A recent email question spoke of building a “Holzhaufen” which I know of.
I no longer burn wood even though I did for 25 years. However, a lot of people do not know what a Holzhaufen is so I am going to write about it.

A Holzhaufen is a very charming way to build a wood pile. I have a very dear friend who builds Holzhaufen on her property and they are individual works of art as far as I am concerned.

The word Holzhaufen means woodpile in German and they range anywhere from 4 foot to 10 foot and the wood is split in lengths from 12 inches to 24 inches. Be aware that wood shorter than 12 inches tends to bulge and tip the Holzhaufen. It is very important to split the wood because it not only dries faster, but it also interlocks and that is a very important necessary requisite for sturdy Holzhaufen construction.
This attractive woodpile requires a level piece of ground and one pile can contain as much as two and a half cords and can be built in just one hour.
I like the Holzhaufen because it takes up less space than conventional "wood stacking" -- and shortens drying time, even during the dampest kinds of weather.
When you split your wood and start to build one of these remember that the thinner end goes towards the middle.
Place a center pole which is called the indicator pole into the ground, approximately the height the Holzhaufen is to be. A good height to start with is ten ft. Make sure you indicator pole is placed plumb and it will assure that the pile is vertical. By keeping the wood placed around it at equal distances, your Holzhaufen should remain in a perfect circle around the indicator pole.
The roof of the Holzhaufen is made by placing several pieces of wood, bark-side-up, in junction at the top of the cone.
A Holzhaufen as high as 10 ft. will stand as long as the wood will hold up, and -- within a period of three months -- will probably shrink to about 8 ft. This shrinkage will continue as moisture is lost from the wood. Thus, the center indicator pole can be used as a measure of dryness. When the Holzhaufen has shrunk between 20 to 25%, the wood is now ready to be brought in and burned.

May the Creative Force be with you as you tread the earth lightly!
Arlene Wright-Correll
04 Jun Mon 2018
Ask Arlene about dahlias and gladiolas ©
Ask Arlene about dahlias and gladiolas ©
By Arlene Wright-Correll
An email questions said, “My dahlias in the last two years froze to death. Do you know anything about digging, drying, storing them over winter?”

Around our part of Kentucky people usually leave them in the ground all winter. Usually in the spring dahlia tubers may be divided. You plant tubers 6 inches deep when soil has warmed after frost or start early indoors in pots. Water tubers sparingly once after planting and then do not water until new growth appears. Fertilize with 5-10-10 when growth reaches two inches tall.
However, you are not alone as the past two winters many people have lost them. So here is some good advice about end of the season care.
Wait a few days after the foliage is blackened by frost before digging the tubers to store for the winter. If plants are in a frost-free area, dig by mid-November. Cut the stalk to 4-6 inches tall, rinse off the soil, and allow the clump to air dry under cover for 24 hours.
Next you line cardboard boxes or terra-cotta pots with newspaper and layer tubers with barely moist sawdust, sand, or peat. Do not store in plastic. Keep boxes cool (40 to 50 degrees F) and dry for the winter in a dark spot and check for rot or shriveling on a monthly basis. Should shriveling occur, mist the packing material lightly with water.
Remove all old foliage from the garden area.
Another way is the winter is mild mulch plants heavily if over wintered in the ground in Zones 7 and above. Further north, wait until a few days after frost has killed the foliage, then do as above.
Another email asks, “When do I divide my gladiolus bulbs?”

In areas that experience frost, the gladiolus corms require digging before the first hard frost in fall or early winter. The corms can't survive if they freeze, although a light frost rarely freezes the soil. In areas that don't experience frost, dig the corms either when the foliage yellows and begins to die back or six weeks after flowering completes.
Dividing your gladiolus bulbs for planting starts in the fall so dig up each corm and remove the small cormlets from the bottom. Store them over the winter and plant them in the spring. The cormlets will grow into a plant, but won't produce a flower this first year.
Dry peat moss or vermiculite provides a sterile storage medium for gladiolus corms. Fill a shallow box or a cloth bag with the storage medium. Dusting the corms with a bulb fungicide prior to storage prevents disease issues during storage. Store the corms buried in the dry medium and make sure you arrange them so that they don't touch one another. A cool, dry location that isn't exposed to freezing temperatures supplies the optimum storage conditions.
May the Creative Force be with you as you tread the earth lightly!
Arlene Wright-Correll
03 Jun Sun 2018
Ask Arlene about more mushrooms©
Ask Arlene about more mushrooms©
By Arlene Wright-Correll
The rest of 2 day’s ago article’s answers…..

Reishi (Ganoderma lucidum) Reishi mushrooms have long been used in Traditional Chinese Medicine. Research in the medical journals International Journal of Medicinal Mushrooms and Neuropharmacology shows reishi mushrooms can help protect against seizures and stroke, and potentially help treat Huntington’s disease, a serious degenerative brain disorder that affects muscles, memory and behavior patterns. Reishi appears to work on the pathways that regulate the energy centers of brain cells.
Reishi mushrooms may also hold tremendous potential for breast cancer, according to research in the medical journal PLOS ONE. Scientists concluded that reishi suppresses tumor growth and is a potential therapeutic aid for breast and other cancers. Note: One should NOT take if using warfarin or another blood thinner, if on chemotherapy or taking immunosuppressants.
These study results were achieved using reishi extract, which, like chaga extract, is made by infusing reishi mushrooms in alcohol. Reishi extracts, as well as dried whole or powdered reishi, are available from most health-food stores. Add them to soups, stews or curries, or use them to make broth.

Cordyceps (Cordyceps militaris) Cordyceps is also called caterpillar fungus because in the wild it’s a parasite that grows inside caterpillar bodies. It has been used for thousands of years in Chinese medicine as a lung and kidney tonic; to improve stamina, fatigue, shallow breathing and wheezing; and as an aphrodisiac. Today, it’s quickly becoming known for its anti-cancer properties, as it contains three compounds that have proven anti-tumor activity. Note: Don’t use if you have a myelogenous type of cancer, if you take insulin or other blood-glucose lowering medications, or if you take any drug that has a blood-thinning effect.
New research published in the journal Phytomedicine found cordyceps inhibits cancer growth and causes cancer cells to die without harming healthy cells. Earlier research in the Japanese journal Fitoterapia shows cordyceps works against cancer in six ways, including blocking the ability of tumors to grow (anti-tumor); blocking the ability of cancer cells to multiply (antiproliferative); stopping cancer from spreading (anti-metastatic); improving the immune system’s ability to fight cancer (immunomodulatory); attacking free radicals before they can damage cells and tissues (antioxidant); and causing cells to die (apoptotic).
Cordycepin, an active element in cordyceps, was shown effective against prostate cancer, according to research in the journal Environmental Toxicology and Pharmacology. A study in the journal Food and Chemical Toxicology also indicated that cordyceps killed lung cancer cells. Other research found that cordyceps reduced the growth ability of the skin cancer known as melanoma. The mushroom has a spicy, cinnamon-like scent that lends itself to soups.

Chaga (Inonotus obliquus) Chaga also called birch mushrooms because they grow on birch trees, are black fungi with an orange-brown patch that can grow to more than four pounds.
The Cree American Indians used chaga in ceremonies and as a treatment for arthritis. Today, research has predominantly focused on the mushroom’s anti-cancer properties. Multiple studies published in the International Journal of Medicinal Mushrooms found that chaga inhibited tumor growth.
Additionally, chaga has shown effectiveness in the treatment of GI disorders, including gastritis, irritable bowel syndrome and stomach ulcers. Note: Chaga may interact with antidiabetic, anticoagulant and antiplatelet drugs. The mushroom also contains sugars that prevent the absorption of glucose, thereby offering assistance in regulating blood sugar levels in diabetics.
These studies used chaga extract, obtained from infusing the mushrooms in alcohol for at least two weeks and then straining. Chaga extract is available from most health-food stores. Although dried or ground chaga can be a bit more difficult to find, you can add it to savory soups, stews or curries, or to make broth. It also can be a tea: Simmer a handful of whole chaga chunks in a quart of water for 10 minutes; strain; enjoy with nut milk or maple syrup.
NOTE: If you are really sick or if your child is really sick I recommend you seeing your doctor.
Home Farm Herbery LC sells 10 different kinds of dried mushrooms.
Magical Forest Blend Dried Mushrooms
Plus the gourmet of gourmet snack treats… Mushroom Chips
May the Creative Force be with you as you tread the earth lightly!
Arlene Wright-Correll
01 Jun Fri 2018
Ask Arlene about Marshmallow Root Honey and more. ©
Ask Arlene about Marshmallow Root Honey and more. ©
By Arlene Wright-Correll
An email question asked me, “Last week you wrote about herbal teas. Do you know any recipes for marshmallow root honey paste or slippery elm honey paste?”

Yes I do and here they are.Marshmallow Root Honey Paste has an odd, earthy flavor.

You can use the root for its anti-inflammatory and mucilage properties. If you have chronic, ongoing state of gastrointestinal distress, you need something that would coat the inflamed internal tissues while also repairing them and that’s exactly what marshmallow root does!Mix up to 1 teaspoon of powdered marshmallow root with enough honey to make a paste. Eat it all at once.It is an anti-inflammatory, diuretic, highly demulcent, highly emollient, mucilaginous and nutritive.

Slippery Elm Honey Paste tastes like dessert.

It is used to relieve acid reflux, to help resist disease and for its incredible restorative abilities.Mix 1 teaspoon of powdered slippery elm with enough honey to make a paste. Eat it all at once. People eat it anywhere from 2 to 4 times a day depending how their immune system has been compromised. Otherwise, I eat it twice a day. You can mix it with powdered marshmallow root, just combine two parts slippery elm with one part marshmallow root.It is a demulcent, detoxifier, emollient, health tonic, laxative, mucilage and nutritive.
A recent email question asked, “Do you know anything about mushrooms?”
The world is home to an estimated 1.4 million species of mushrooms, but only about 700 have been explored for medicinal properties. Here are four of the finest fungi.

Lion’s Mane (Hericium erinaceus) is a beautiful, large, white mushroom that derives its name from its long ridges that resemble a lion’s mane. Although its crab-like taste and texture make it a popular culinary mushroom, research shows this mushroom also offers some serious health benefits. Perhaps its greatest promise is as a treatment for brain and nerve diseases such as Alzheimer’s disease.
New research in the International Journal of Medicinal Mushrooms found this mushroom promotes nerve cell regeneration following injuries. For many years, it was accepted as medical fact that nerve regeneration was impossible, but this exciting research may prove otherwise. Additional research found that a liquid extract of the mushroom helped grow new brain and nerve cells known as neurons.
About a dozen studies have shown lion’s mane has impressive brain-healing properties. In one study, mice with amyloid plaques comparable to those found in Alzheimer’s were fed a normal diet then compared with mice fed a normal diet plus lion’s mane. The lion’s mane mice regained cognitive capacity, were more capable of navigating mazes, and had a reduction of beta-amyloid plaques, a biomarker that suggests a reversal of Alzheimer’s.
Fresh lion’s mane mushrooms are increasingly available in gourmet food, grocery and health-food stores. To prepare, simply sauté in olive oil with salt and chopped garlic. Its bitter raw taste disappears when cooked until crispy at its edges.
I will continue about mushrooms in my next article.
Note: Home Farm Herbery LLC strongly recommends you see your doctor for any medical advice,
May the Creative Force be with you as you tread the earth lightly!
Arlene Wright-Correll
Kathy F. of New Boston, MI is May's art contest winner!
Kathy F. of New Boston, MI is May's art contest winner!

31 May Thu 2018
Ask Arlene about transplanting and dividing Perennials ©
Ask Arlene about transplanting and dividing Perennials ©
By Arlene Wright-Correll
A recent email question asked, “How do I deal with transplanting and dividing Perennials?”

For those of us who plant perennials we need to know that eventually we will have to divide them and the best time to divide them is in the early spring or fall.
Spring is the ideal time to transplant fall-blooming perennials and ornamental grasses and I find that fall, just about 6 weeks before a real hard frost is the best time to divide and transplant the spring blooming perennials.

Clumping perennials such as daylilies, chrysanthemums, asters, hostas, are plants typically grow from one main crown. The crown gets larger and larger each year, and sometimes you’ll see offsets (baby plants) attached to it. These plants are easiest to divide if you dig them up completely, so you can separate and divide the crown.
Taproot perennials such as oriental poppies, balloon flowers and butterfly weed just have one main, deep root. To divide them, you must dig up the plant and cut it so that each division has a piece of the taproot along with some growth buds.

Woody perennials like lavender, rosemary, candytuft, and euonymus have just one main stem or trunk, but they often spread when a stem touches the ground and takes root. You can sever and dig up the new plant without disturbing the original plant.
Spreading perennials like bee balm, phlox, leadwort, perennial vinca, and gooseneck loosestrife grow by surface or underground roots, or by dropping seed. They look more like a grouping of individual plants, each with its own crown and root system. You can divide these plants simply by digging up the ones you want to move while leaving the rest alone.
Once you have correctly divided your plants you are ready to replant your perennials. After the trauma of digging and ripping apart your beloved plant, you can see how important it is to baby them in their new home. Dig a hole as deep as, and a little wider than, the root ball then mix in plenty of organic matter and sprinkle a source of phosphorus, such as bone meal or 0-19-0 fertilizer, in the hole to promote root growth.

Now place the division in the planting hole. Make sure the roots are spread out and down making sure the roots are down because you don’t want downward-growing roots to be turned upward in the hole or sticking up out of the ground.
Fill in around the plant with soil, tamping it gently down making sure the new plant is planted at the same depth as it was originally.
Water the plant well, and feed regularly with a balanced organic fertilizer. You must water about every other day for the first 2-3 weeks. You may want to water with a little extra water for the rest of the growing season, particularly if they’re planted in a spot that doesn’t receive regular water. Add mulch around the plants to insulate the roots and hold in moisture.
Remember you can get many different kinds of seeds at our store by clicking Home Farm Herbery now.
May the Creative Force be with you as you tread the earth lightly!
Arlene Wright-Correll
29 May Tue 2018
Ask Arlene about fall plantings and elderberries©
Ask Arlene about fall plantings and elderberries©
By Arlene Wright-Correll
A recent email question asked, “What are good seeds to plant in the fall?”
Fall planting is very good because eighty percent of a plant’s root growth occurs in late summer and fall, so plants establish better. We used to have milder temperatures and more dependable rainfall help plants acclimate in the fall and the fall soil is warmer and more conditioned than spring soil, making root growth easier. The seasons are changing. However, I also find pests and diseases that might otherwise attack young, vulnerable plants are not as active or numerous in the fall and less water is required to establish fall plantings as plants begin to go dormant for the winter. Plants put into the ground in the fall bloom more profusely the following spring. Plants with an established root system can better withstand heat and wind the following summer. It is the best time of the year to plant trees instead of spring when they are offered. I also find it the best time of the year to find tree bargains. Aside it is the best time of the year to plant bulbs.
With all that in mind I will get back to the seeds. Oriental Poppies may be a good choice for fall planting in your area. Radishes are quick and easy for fall planting. Beets are a cool-weather crop, direct-sown in fall or as soon as soil can be worked in spring. Before planting, make sure that the soil is as loose, rich, and well-drained as possible, so that the root can grow without stress. Turnip is suitable for spring, fall, and even winter crops in mild areas. It overwinters beautifully, and is perfect for New Year's Day. Garlic is a perfect fall crop.
Try Cornflower seeds which are a good perennial. Wild Flowers will grace your garden next spring and for years to come if you cut them down 6 to 8 inches above ground the next fall and there after. Try Green Wizard Rudbeckia. How about spearmint, lavender, oregano, pampas grass, creeping thyme, sweet William, lambs ear, chamomile just to mention a few. Try catnip.
You can obtain most all of these seeds at Home Farm Herbery with Free shipping & a free gift.
Another question asks, “I hear elderberries are good for flu or colds. So you have a good recipe?”

Elderberry tonic recipe.
Ingredients:
2/3 cup Elderberries (fresh or frozen),

3-1/2 cups of water,
2 tbsp fresh or dried ginger root (or powder),
1 tsp cinnamon powder,
1/2 tsp cloves or clove powder
1 cup raw honey.
Instructions:
Pour water into a medium saucepan and add elderberries, ginger, cinnamon and cloves.
Bring to a boil and reduce to a simmer until the liquid reduces to almost half (about 45 minutes to 1 hour).
Remove from heat and let cool for 15 minutes.
Pour through a strainer into a glass jar or bowl.
Discard the elderberries (feed to chickens or compost) and let the liquid cool to lukewarm.
Add 1 cup of honey and stir well. (Note: honey is added after the mixture has cooled to keep raw enzymes intact).
Pour mixture into glass jars to be stored in the fridge for up to three months.
Recommended doses: Prevention (can be taken daily).
Kids (13 months-12 years old): 1/2 to 1 teaspoon.
Adults: 1/2 to 1 Tablespoon.
NOTE: If you are really sick or if your child is really sick I recommend you seeing your doctor.
May the Creative Force be with you as you tread the earth lightly!
Arlene Wright-Correll
28 May Mon 2018
Ask Arlene about Cucamelons and droughts ©
Ask Arlene about Cucamelons and droughts ©
By Arlene Wright-Correll
A recent email question asked, “What are Cucamelons?”
Cucamelons (Melothria scabra) are also called Mexican sour gherkins or mouse melons. They are close relatives of cucumbers and other cucurbits and are native to Mexico and Central America and have been grown for centuries. Here in the U.S. we've only just "discovered" them. They are probably the cutest little things I've ever grown. They are rare.

Like their cucumber cousins, cucamelons are monoecious, meaning male and female flowers are borne separately on each plant. The male flowers provide the pollen while the female flowers will go on to produce the fruit. The flowers are very tiny being a 1/6 inch tiny and the little, iridescent native bees love them! Even if you don't harvest the fruit, they make a great pollinator plant.
Don't let the plants ramble; instead, grow them up a trellis or fence of some sort. If they're left to spread out over the ground, harvesting them will be a major pain. There are so many fruits; you'd be bending over for hours just to harvest them all.
The seeds are extremely small, but they hold a lot of potential. Don't plant the entire seed packet, unless you plan to eat a lot of cucamelons! Start with a dozen seeds at most. You can always grow more the following year.
Each fruit is about the size of a grape, but the texture is far crunchier than you'd expect. They make delicious little dill pickles just by using one of those pre-packaged dill pickle spice blends you can get at the grocery store. The seeds are carried by Home Farm Herbery.
Another email question asks, “How Do You Garden in a Drought?”
The seasons are changing. Here I have notice for the past 2 years that February really doesn’t end until April and September is like July. Thus we act accordingly. At Home Farm Herbery we tend to use raised beds, straw bale gardening. You can grow a lot in a 4 ft x 4 ft or 4 x 8 ft raised bed and it doesn’t take a lot of watering.


If your property is not large enough to have holding ponds then seriously consider rain barrels to catch all that early spring rain. Everyone has their garden favorites, but open your mind and your palate to varieties more suited to your climate and changing weather patterns. When buying seeds, look at the plant descriptions and choose varieties that are heat tolerant. Most squashes, pumpkins, melons and beans do very well in the heat, though they still need irrigated. There are so many things that we have no control over, and the best we can do is to adapt to the changing conditions
May the Creative Force be with you as you tread the earth lightly!
Arlene Wright-Correll
27 May Sun 2018
Ask Arlene about tea and tea recipes©
Ask Arlene about tea and tea recipes©
By Arlene Wright-Correll
The other day I was asked if I knew some good herb tea recipes. Here are three of my favorite recipes.

Calendula Tea. Calendula is beautiful, delicate and lightly aromatic. You can use it as a tea for its ability to move the lymph system, its ability to relax the gastrointestinal tract by reducing inflammation and getting bile and other digestive juices moving, and its whole-body detoxifying properties. You can drink a couple of cups a day and really enjoy it in the late morning and early afternoon. Bring 6 ounces of water to a boil and steep 2 teaspoons of dried calendula flowers for 10 to 15 minutes. Remove teabag. Sweeten with honey, if desired. Calendula also supports healthy skin and makes a fantastic compress to use on acne and cold sores. After making it into a tea, I save the teabag and use it on my face at night before going to bed. It is an antiseptic, antiviral, antispasmodic, anti-inflammatory, astringent, bitter tonic, detoxifier, diuretic, and diaphoretic, estrogenic.
Chamomile Tea. Chamomile is a favorite tea as it’s tremendously soothing for the whole body. You can use it for gallbladder support, nausea relief and its antispasmodic and anti-inflammatory properties. Bring 6 ounces of water to a boil and steep 1 teaspoon of dried chamomile flowers for 10 minutes. Remove tea by straining. Sweeten with honey, if desired. Chamomile has sedative properties, which make it a fantastic sleep aid. Use it to assist with relieving anxiety and settling the body. If you have trouble sleeping then a strong cup right before bed to help settle your body and relieve nausea that tends to pop up in the evenings. It is antibacterial, anti-inflammatory, antiseptic, antispasmodic, bitters, prevents vomiting, sedative.
Spearmint Tea.
It’s both invigorating and soothing at the same time. It is often used for acid reflux, expelling gas and nausea relief. Bring 6 ounces of water to a boil and steep 1 teaspoon of dried spearmint leaves for three to five minutes. Remove tea or strain. Sweeten with honey, if desired. Spearmint is a lovely herb to use in a blend. It is also used alongside chamomile. Although the herb contains menthol, it doesn’t have nearly as much as peppermint. This is why it can relieve acid reflux rather than exacerbating it, as peppermint has been known to do. It is an antibacterial, anti-inflammatory, decongestant, digestive, stimulant, stomachic, tonic.
You can buy these herbs and even pre-made herbal teas and tisanes on Home Farm Herbery’s site and even get free shipping. Check out our online store today.
May the Creative Force be with you as you tread the earth lightly!
Arlene Wright-Correll
25 May Fri 2018
Ask Arlene about digestive herbs and more©
Ask Arlene about digestive herbs and more©
By Arlene Wright-Correll
I was recently asked, “Can you tell me about digestive herbs?”

Most culinary herbs help digestion, but a few are outstanding such as mint (Mentha spp.). Spearmints, peppermints and other mints are all respected for their digestive benefits.

In the early Christian church, peppermint was so valued it was accepted as payment of tithes. Well-studied for its digestive effects, peppermint contains several carminatives such as menthol; anethole and carvone that help settle the stomach and relieve gas. Peppermint is also a gentle “bitter herb.” Bitter herbs are those that aid digestion by stimulating bile production.
Caraway (Carum carvi) and these seeds contain carvone and other compounds that relax the smooth muscles of the digestive tract. Seed extracts used in certain commercial herbal digestive aids (sometimes along with peppermint oil) have been found to improve chronic indigestion. Enjoy a small dish of caraway seeds with cheese, or sprinkle them into soups or stews.

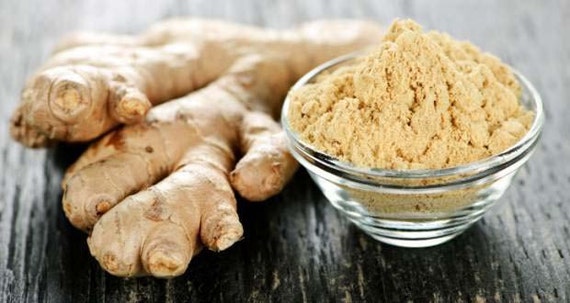
Ginger (Zingiber officinale). The gingerols and shogaols in ginger are antispasmodics, soothing the stomach and stimulating peristalsis. Ginger encourages gastric emptying. It also relieves constipation, and may ease symptoms of irritable bowel syndrome. Gingerols degrade with cooking, processing and storage, so enjoy it fresh or minimally cooked.
Another question asked is “How can I judge art?”
There are many ways and here are a few of them. I look forbeauty, skill, inherent meaning, uniqueness, and fulfilled intent. Beauty is really in the “eye of the beholder”.
One may as if the repeating shapes, patterns, and symmetry or if colors, especially colors that complement or enhance each other. Are the textures, both visual and physical (like thick, impasto paint) and in crops and compositions that focus the eye and keep the viewers’ attention. Is the movement or flow guiding the viewers through the art? Are there correct or appealing proportions of figures and objects and lastly is the presentation and framing. Correct.
Recently I was asked a very good question. “As an artist is a blog really worth my time?”
My answer is yes. Today the internet is a highway and a blog is like a billboard on the biggest highway in the world. When you start a blog, it’s like putting up a billboard next to the biggest highway in the world.
At first, your blog/billboard is small and people can barely see it as they drive by, and only if they’re really looking for it, but every time you add another blog post to your blog. Your billboard gets a little bigger! Each new post is like adding an extra square foot of signage to your board. If you add a new blog post every day (or every other day) people won’t have to look quite so hard to see your billboard. In fact, after about a half year of blogging, you’d probably be getting some decent attention!
May the Creative Force be with you as you tread the earth lightly!
Arlene Wright-Correll
24 May Thu 2018
Ask Arlene about herbs that do not require a lot of sun and more©
Ask Arlene about herbs that do not require a lot of sun and more©
By Arlene Wright-Correll
One of my readers asks, “I have a lot of shade on my property and I want to grow some herbs that do not require a lot of sun. Can you suggest some?”
Yes, while we are quite the opposite at Home Farm Herbery many of our culinary herbs do require lots of direct sunlight such as basil and oregano, which originated in the sunny Mediterranean. Yet other herbs usually listed as full-sun plants will do just fine in partial shade and these include parsley, anise hyssop, lemon balm and shiso are among the best herbs for dappled light or areas that receive only a couple of hours of direct sun daily.
There are plants such as wild ginger, spicebush and sweet woodruff that will do beautifully in a shady garden site, and will add enticing new flavors and aromas to your cooking.
For beds and borders shaded by trees, fences or buildings I suggest you consider these herbs for shade. Sweet woodruff, Anise hyssop, Wild ginger, Parsley, Shiso (which is the now common name for the Asian culinary herb, seed, or entire annual plant of Perilla frutescens variety crispa, belonging to the mint family), Lemon balm and Spicebush
(Spicebush variety Lindera benzoin is a flowering plant in the family Lauraceae, native to eastern North America, ranging from New York to Ontario in the north, and to Kansas, Texas, and northern Florida in the center and south).
Another reader asks, “Do you know of a natural remedy for Mosquito bites?”
Yes and you will find it even in most backyards. Plain old plantain (Plantago, various species) is one of the best herbs to treat bug bites. This is a very common weed, often growing in compacted soil along sidewalks and driveways. To use the plant as first aid for a mosquito bite, crush a few leaves and rub them on the bite.
Yet another reader asks, “How do I get rid of tomato hornworms which seem to attack my tomatoes each season?”
If you are killing wasps in your area you may be killing off the Braconid wasp which is
an organic solution. This beneficial insect is as creepy as it is useful in the garden.
The mature female wasp lays eggs just under the skin of the tomato hornworm and several other garden pests. When the wasp larvae hatch, they feed on their living host animal before tunneling out through the host’s skin to pupate. As you’d imagine, this weakens and eventually kills the host. Attract braconid wasps to your garden with small-flowered, nectar-rich plants, such as yarrow, dill, fennel, sweet alyssum, chamomile and buckwheat. Just plant a row between your tomato plants in the event you do not have herb beds such as we do at Home Farm Herbery.
May the Creative Force be with you as you tread the earth lightly!
23 May Wed 2018
Ask Arlene How to turn grapes into raisins & other stuff©
Ask Arlene How to turn grapes into raisins & other stuff©
By Arlene Wright-Correll
A question asked of me this week, “How can I turn my grapes into raisins?”
Here is my Home Farm Herbery Homemade Raisins Recipe
Blanch grapes by dropping by the bunch in boiling water for 30 seconds, then transferring into a bowl of ice water. Remove stems. Pat dry with a towel and spread in a single layer onto baking sheets. Place baking sheet in an oven set to warm (180 degrees is ideal) and allow to dry 18-24 hours, turning after 12 hours to prevent sticking. Once dark and wrinkled, remove from oven and allow to cool before storing in an airtight container.
Note: should you not have grapes and want KY grown natural raisins that are made at Home Farm Herbery then we have Jumbo Thompson Seedless Raisins.
An email question asks, “Do you know how to make Wild Greens Soup?”
Yes and here is a good recipe.
Ingredients:
1 medium onion, finely chopped
1 clove garlic, chopped
1 tablespoon vegetable oil
2 teaspoons curry powder
2 cups chopped potatoes
4 cups chopped tender wild greens
4 cups water
1/2 teaspoon salt
1/2 teaspoon freshly ground black pepper
Tamari sauce to taste
Directions:
Sauté the onion and garlic in the oil, stirring constantly, until the onion is translucent. Stir in the curry powder and sauté a minute longer. Stir in the potatoes and greens. Sauté briefly! Add the water and simmer, covered, for 15 minutes or until the potatoes are tender. Puree, then reheat and season with salt, pepper, and tamari.
Another email question asks, “I heard one can make sorbet out of lilac flowers. Is that true?”
Yes and here is a great recipe for lilac sorbet by Cathy Wilkinson Barash, who says she adapted it from her dianthus sorbet recipe in her book Edible Flowers: From Garden to Palate (Fulcrum Press, 1995).
2 cups water, ¼ cup sugar, ½ cup lilac florets, stems removed and coarsely chopped (the stronger scented, the better).
Pour water into an enamel or stainless steel saucepan. Add sugar and florets, stirring well to dissolve sugar. Next bring liquid to a boil, turn down heat and simmer for 5 minutes. Remove from heat and let cool to room temperature. Now pour into an ice cream maker and process according to manufacturer’s directions. If not serving immediately, scoop sorbet onto waxed paper in serving-sized portions, on a cookie sheet and freeze. Once frozen, put in a freezer bag.
Serving suggestion: Put a sweet-flavored daylily flower (pistils and stamens removed) in a wineglass, and then add a scoop of the sorbet. Top with candied lilac blossoms.
*Dark-colored flowers produce an interesting color sorbet; light-colored flowers produce an almost translucent white sorbet.
May the Creative Force be with you as you tread the earth lightly!
Arlene Wright-Correll
21 May Mon 2018
Ask Arlene about Chia Seeds©
Ask Arlene about Chia Seeds©
By Arlene Wright-Correll
I have finally decided to change the “Art only Spoken Here©” column to “Ask Arlene©” since I seem to get 90% more questions about everything else except art. However, when we get an art question that I have not written about over the past years, I will gladly answer it. In the meantime, here is a new question.
A recent email question asks, “Are Chia seeds edible and are these what are used on Chia pets. Are they easy to grow?”
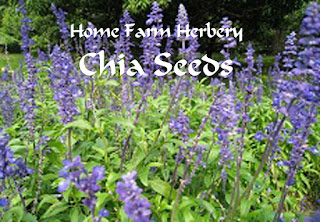
Yes, they are and yes they are edible. Chia seeds, originally used by the ancient Aztec culture as a food source, are prized for being high in omega-3 fatty acids and other nutrients. Our Home Farm Herbery Organic Chia seeds (Salvia hispanica) are extremely high in Omega-3 and are loaded with antioxidants, vitamins, minerals, and fiber. Organic chia seeds can be eaten raw as a dietary fiber and omega-3 supplement. The soaked seeds are gelatinous in texture and are used in gruels, porridges and puddings. Ground chia seed is used in baked goods including breads, cakes and biscuits.
Chia Seeds help weight loss. Chia seeds are popular for weight loss since they reduce food cravings by preventing some of the food that you eat from getting absorbed into your system. This blockage of calorie absorption makes them a great diet helper and you feel fuller faster: They can also help your diet by making you feel full. This is because they absorb 10 times their weight in water, forming a bulky gel. These are also great for athletes because the "chia gel" can hydrate the body. Plus there is evidence to suggest they can reduce blood pressure. Omega-3: They are the richest plant source of Omega-3 (the vital fats that protect against inflammation—such as arthritis—and heart disease). In fact, they contain more Omega-3 than salmon!
Lots of benefits for diabetics because chia seeds slow down how fast our bodies convert carbohydrates into simple sugars, studies indicate they can control blood sugar. This leads scientists to believe chia seeds may have great benefits for diabetics. They are easier to digest than flax seeds, and don't need to be ground up.
They can be eaten raw as they have a nice "nutty" flavor or they can be soaked in fruit juice as they do in Mexico where they call this "chia fresca". They're perfect in porridges and puddings and they make an ideal addition to baked goods including breads, cakes and biscuits. We recommend two daily doses of about 20 g each (1.5 ounces total).
Chia seeds are tiny. You don't need to dig a hole to bury them. Lightly ruffle your weed-free garden area with a rake or, if you only have a few seeds and are spacing them carefully, loosen the earth with your fingers. Sprinkle a few seeds over the soil, and rub gently to cover them. Water the seeds daily, and within about a week you can expect to see chia sprouts taking form. When planting chia seeds directly into the garden, I create a carpet of chia and then thin the plants as they grow. Some are fed to the hens, some are used as mulch, and some are harvested while young to dry the leaves for chia tea.
Chia seeds germinate successfully in pots. If you want to start your chia plants indoors or close to your garden tap, sprinkle them lightly in your pot and water regularly. When they are about three inches tall, they are ready for transplanting.
Remember to mulch your chia plants and water them regularly. They thrive in an organic garden and don't like competing with weeds. Chia plants grow as tall as an adult. In addition to the health benefits associated with eating chia seeds and drinking chia leaf tea, chia flowers look lovely in the garden since they have a lovely purple/lavender colored flower.
Note: If you wait until the flower head browns, you risk losing seed. Begin harvesting your chia as soon as most of the petals have fallen. Give them time to dry in paper bags or on a drying rack, but prepare for at least some of the chia seeds to break free in the process. Do not hang the plants upside down in your shed.
Tread the earth lightly and in the meantime may the Creative Force be with you.
Arlene Wright-Correll