
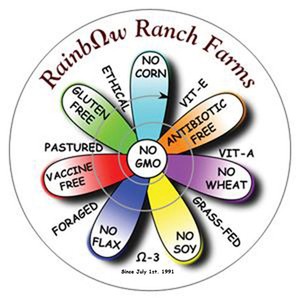
Rainbow Ranch Farms
19 Jan Wed 2011
Want To Move To CA. Start A Farm
Ever thought of starting a farm? Already have a farm and want to relocate? Here is a great resource, they always have large properties, pasture lands etc. for lease, rent, foreclosures for sale. With water wells and without!
TERRA LINDA PROPERTIES: 7611 Etiwanda Ave. Rancho Cucamonga, CA. 91739 They would love to hear from you!
Temecula Farmers Market Vendors vs Farmers
A small farmers market, located in beautiful down town, old town Temecula. Sat. 8:00am - 12:30pm corner of 6th and front street.
Below you will find a list of farmers, Ancillary retail re-sellers and artisan vendors. If you would like more details on what each vendor, farmer, re-seller and artisan actually do, offer or are permitted for, please contact the market manager or the California Department of Food and Agriculture.
760-728-7343
18 Jan Tue 2011
Joel Salatin of Polyface Farms discusses grass-fed cattle
Joel Salatin of Polyface Farms discusses grass-fed cattle
http://www.youtube.com/watch?v=5nIcfh2UqV8
How to build a 14x14 solar cabin - Under $200.00
How to build a 14x14 solar cabin for under $200.00
http://www.youtube.com/watch?v=qghZ2ao7GKM
17 Jan Mon 2011
Joel Salatin in Chico Presented By Chaffin Family Orchards
| Time |
Monday, January 17 · 5:30pm - 9:00pm
|
|---|---|
| Location | Chico Masonic Family Center
1110 West East Avenue
Chico, CA
|
| Created By | |
| More Info | Order tickets via Eventbrite: http://chaffinorchards-efbevent.eventbrite.com/ Joel Salatin speaking in Chico, CA About the Power of Local Food Come hear Worldfamous Sustainable Farmer & International Speaker from Polyface Farms who was featured in Michael Pollan's Omnivore's Dilemma, Academy Award Nominated Food Inc., and FRESH The Movie For more details and information read our email about the event http://archive.constantcontact.com/fs026/1101935835957/archive/1104179498618.html Chris Kerston Chaffin Family Orchards 606 Coal Canyon Rd Oroville, Ca 95965 |
How to Build Hoop Houses : Greenhouse & Hoop House Irrigation
How to Build Hoop Houses : Greenhouse & Hoop House Irrigation
click for short video
http://www.youtube.com/watch?v=3j09zP84boM&feature=related
How To Grow Wheatgrass- Simple and Cheap
How to grow wheatgrass, simple and cheap!
Click for short video
http://www.youtube.com/watch?v=IL0URJcZF8w
16 Jan Sun 2011
Growing Swiss Chard-EASY
Growing Swiss Chard - advice on how to grow Swiss Chard
Chard is a green leafed vegetable that makes a good alternative to spinach. Growing Chard can be easier than growing spinach as it is better able to withstand higher temperatures and water shortages.
As well as its value as a food crop Swiss Chard also has a very striking value as an ornamental plant and so often appears in a gardens ornamental borders or ornamental pots. Chard is an excellent source of vitamins and minerals. It's stalks can be of various colours.
Chard is known by a number of different names in including Swiss Chard, Spinach Beet,and Leaf beet.
Preparation
Dig over the soil and dig in some organic matter a number of weeks before sowing. This will help soil moisture retention and soil aeration. Make sure to break up any large clods of soil with your fork and rake the soil to obtain a fine soil structure in which to plant your Chard seeds.
Sowing
Sow Chard in early spring to avoid the final hard frosts. Chard is normally sown directly into the soil, not in seed trays for later tranplanting.
Sow the Chard seed in rows around 45cm apart and about 5 cm apart. The seeds should be sown at around 1 - 1.5cm depth. Germination can take anywhere around 1-2 weeks.
The plants will need thinning to about 15-25cm between plants. If left until around 15cm in height before thinning then the thinned plants can be treated like an early harvest and the young leaves will be extremely tender and tasty.
Position
When growing Chard you should position the plants in a spot that receives a good amount of sunlight. Chard will tolerate partial shade but will give a better yield when in a sunny spot.
Chard is a cool weather vegetable and may withstand a very mild frost.
Soil type
Chard doesn't like a soil that is too acidic, an acidic soil will stunt growth. Chard grows well in a soil of around 6.5 - 6.8.
The soil should be able well drained but be able to hold moisture well so a soil with a good amount of organic matter is ideal.
Tending
To extend harvesting past the first hard frost you can put the plants under a cloche or polytunnel to extend the growing season.
Chard is sturdier than spinach and can cope better with water shortages, however you should still water regularly to ensure optimum growth and prevent bolting. Bolting leads to premature flower and seed production and will divert the plants energies away from leaf growth.
If a flower stalk develops then clip it off to extend the harvest.
Harvesting
Chard is a pick and come again crop. For multiple harvests from the same plant simply pick the outer leaves and leave the inner younger leaves. You can pick leaves after they have reached around 15cm in length. Chard can be harvested until the first hard frost this way.
Chard does not store well so should either be eaten within a few hours of picking or stored in the salad box of the fridge for a maximum of 3 days.
Be sure not to damage the central terminal bud at the centre of the young growth.
You can also if you wish harvest the whole plant.
After picking the leaves simply wash and add to salads or wash and then quickly heat in a pan using only the water that clings to the leaves after washing. This will avoid overcooked soggy chard leaves.
Varieties
Chard varieties are available with a variety of stalk colours - red, yellow and white.
http://www.gardeningpatch.com/vegetable/growing-swiss-chard.aspx
15 Jan Sat 2011
Celebrity Cook-Off 2011
Celebrity cook-off 2011 - All the produce, meats, dairy, fish etc.. will be locally grown and of heritage varieties. Grown without the use of pesticides or herbicides. The meats will be 100% pure, grown without the use of corn, soy or wheat and G.M.O. FREE!
We will try to make it a 100 mile celebrity cook-off this year. To have your products considered for the 2011 event please contact the farm from our listing page, here on LH.
Growing Spinach - advice on how to grow Spinach - EASY
Growing Spinach - advice on how to grow Spinach
Spinach is relatively easy to grow in cool climates and it is packed with nutrients such as iron, protein, vitamin A and chlorophyll.
Whether raw in salads or lightly steamed spinach is a suitable accompanyment to a wide range of dishes.
Preparation
Germination of spinach seeds can take anything between a week and 2 weeks.
Dig the soil to around 30cm depth as this is how far the plants tap root can develop. Work some organic compost or manure into the soil to help provide the necessary nutrients for growth.
Because of the benefit of organic matter cover crops and green manure crops are beneficial prior to planting spinach.
Check the soils PH and if necessary add lime.
Sowing
You can plant spinach in early spring. To stagger your crop over summer you can plant part rows every few weeks. The last planting should be about 50-60 days before the first frosts.
Sow your seedlings / seeds around 7cm apart in rows about 30-40cm apart.
Position
Position your spinach plants in a position that does not experience high temperatures. Spinach grows well in partial to full sun.
Soil type
Spinach likes a moist but not waterlogged soil. Using a mulch of straw or grass clippings can help to retain moisture levels in the soil.
The soil should contain a good amount of organic matter to provide the spinach with the nutrients it requires.
Spinach doesn't like acidic soils, a good PH is around 6.3 -6.8. Add the appropriate amount of lime to the soil if necessary.
Tending
Make sure the soil is moist. An inch of water per week is adequate when there is little rainfall. Thin out your spinach seedlings as required but try not to damage the roots of the plants you leave in the soil.
Effects of an over acidic soil can be seen in the yellowing of the edges of seedling leaves, low germination rates and slow growth.
Harvesting
Spinach is ready to harvest at about 40-50 days after planting.
The spinach leaves can be harvested whenever they look big enough and ready for your salads etc. Make sure to start picking leaves on the outside of the plant, the inner leaves will then continue to grow and produce a new crop. Alternatively you can harvest the whole plant.
You should aim to eat the spinach straight after picking and washing in cool water. You can store the washed leaves in the fridge for a few days but the taste and nutrient content is best after picking.
Varieties
Slow bolting varieties are varieties that take longer to develop a seed stalk and thus focus more growth towards the leaves. Short days and cool temperatures result in better crop yield as bolting is deterred whereas long days and higher temperatures encourage bolting.
http://www.gardeningpatch.com/vegetable/growing-spinach.aspx
14 Jan Fri 2011
How to Grow Bean Sprouts SIMPLE
How to Grow Bean Sprouts SIMPLE
http://www.youtube.com/watch?v=F-1V4vtV8Yo&feature=related
How to Make a Hoop House or Green House for Cheap.
How to Make a Hoop House or Green House for Cheap.
This is for a small, manageable, seedling starter green house. Really this is all any small family needs, you can actually make it any size you need, small or large. Have Fun!
http://www.youtube.com/watch?v=efQYpzNJOiEAnyone Can Grow Sprouts - Growing microgreens and sprouts at home EASY
Growing microgreens and sprouts at home EASY
Nice video here, please click link to be directed to YouTube!
http://www.youtube.com/watch?v=9h1ADMsKQTg
13 Jan Thu 2011
Anyone Can Grow Arugula-Easy!
How to Grow Arugula
Arugula is a leafy green vegetable that is prized for its strong, peppery flavor. Like most lettuces, it is very easy to grow.
Step 1: Purchase the Seeds
Arugula is a spring or fall green that is typically grown from seed. Often called rocket, the leafy vegetable is prized for its strong, peppery flavor. There are two basic types of arugula: cultivated and wild. The wild varieties have a more pungent taste. Popular varieties include Rocket and Wild Italian Rocket.
Step 2: Prepare the Site
Arugula likes cool temperatures, a fair amount of sun and plenty of moisture. With a garden fork, work some high-nitrogen fertilizer into the top 5" or 6" of soil. Partition the garden bed into small sections using pebbles or other materials. These areas make it easy to plant successive crops for a longer harvest of tender greens.
Step 3: Plant the Arugula
In early spring, when soil temperatures are 40 and 65 degrees, it is safe to plant the seeds. Scatter the seeds across the soil in one section of the garden bed. It is fine if seeds overlap as the seedlings will be thinned later on. Cover the seeds with 1/4" of fine garden soil and gently water them in. Keep the bed moist until the seeds germinate.
Step 4: Thin the Seedlings
The arugula seeds should germinate in about a week. When the seedlings are 1" tall, thin them so that the plants are spaced 3" to 4" apart. To remove them, simply snip the plants at the soil line with a pair of scissors.
Step 5: Provide Shade
Many gardeners use shade tents to give arugula a bit of protection from the hot summer sun. Consider using floating row covers suspended by wire hoops. Secure the corners with bricks or rocks to prevent them blowing away.
Step 6: Harvest the Arugula
Arugula is typically ready for harvest between 35 and 45 days after sowing. To harvest, simply pull the outer leaves off near the base of the plant, leaving the inner leaves to continue to grow. Many gardeners prefer to harvest the entire plant by pulling it from the ground, roots and all.
http://www.diynetwork.com/how-to/how-to-grow-arugula/index.html